


Hyper Tough 20 Inch Lawn Mower Manual PDF: A Comprehensive Guide
This detailed PDF manual unlocks the full potential of your Hyper Tough 20-inch lawn mower, offering step-by-step guidance for assembly, operation, and crucial maintenance procedures.
Welcome to the world of efficient lawn care! Your new Hyper Tough 20-inch lawn mower, proudly manufactured by DNA for Walmart, represents a commitment to quality and performance. This mower is designed for homeowners seeking a reliable and easy-to-use machine for maintaining their yards.

This manual serves as your comprehensive guide, detailing everything from initial setup and safe operation to routine maintenance and troubleshooting. Whether you’re a seasoned lawn care enthusiast or a first-time mower owner, this resource will empower you to achieve professional-looking results;
The Hyper Tough 20-inch mower features a 125cc Briggs & Stratton engine, known for its durability and power. It offers adjustable cutting heights and a 20-inch cutting path, making it suitable for a variety of lawn sizes and conditions. Remember to prioritize safety and carefully review all instructions before operating your new mower.
Understanding the Manual’s Importance
This Hyper Tough 20-inch lawn mower manual isn’t just a collection of pages; it’s your key to safe, efficient, and long-lasting performance. Thoroughly understanding its contents minimizes risks associated with operating power equipment and ensures you maximize the mower’s capabilities. Ignoring instructions can lead to damage, injury, or voided warranty coverage.
The manual details critical safety precautions, proper assembly procedures, and a maintenance schedule designed to keep your mower running smoothly for years. It explains the meaning of safety alert symbols – Danger, Warning, and Caution – alerting you to potential hazards.
Furthermore, the manual provides troubleshooting guidance for common issues, potentially saving you time and money on repairs. Downloading and reviewing the PDF version allows for convenient access and reference whenever you need it, ensuring you’re always informed and prepared.
Safety Precautions & Warnings
Prioritizing safety is paramount when operating the Hyper Tough 20-inch lawn mower. This manual emphasizes crucial precautions to prevent accidents and injuries. Always read and understand all safety instructions before assembly or use. Keep children and pets well clear of the mowing area during operation.
Never operate the mower with missing or damaged safety devices. Wear appropriate protective gear, including eye protection and sturdy footwear. Be mindful of potential hazards in the mowing area, such as rocks or debris.
The manual explicitly warns against modifying the mower or using non-approved attachments. Fuel handling requires extreme caution; refuel only when the engine is cool and in a well-ventilated area. Familiarize yourself with the emergency stop procedures detailed within the manual to ensure a swift and safe shutdown if needed.
General Safety Rules
Adhering to general safety rules is vital for safe operation. Always inspect the lawn before mowing, removing any objects that could be thrown by the blade. Never allow children to operate the mower, and keep bystanders at a safe distance. Ensure proper ventilation when refueling, and avoid spilling gasoline.
Never operate the mower barefoot or with open-toed shoes. Always disengage the blade before crossing gravel drives or roads. Be aware of potential fire hazards, especially when mowing dry grass.
The manual stresses the importance of regular maintenance to ensure safe operation. Never attempt repairs while the engine is running. If the mower begins to vibrate abnormally, immediately stop the engine and investigate the cause. Always use genuine replacement parts as specified in the parts list.
Specific Safety Instructions for Operation
Before each use, carefully inspect the mower for any damaged or missing parts. Never remove or bypass any safety devices. Ensure the grass catcher is properly attached before mowing to prevent debris from being thrown towards you.
When starting the engine, hold the handle firmly and ensure your feet are clear of the rotating blade. Avoid operating the mower on steep slopes, as it could lead to loss of control. Be cautious when mowing near obstacles, and always maintain a safe operating speed.

The manual warns against modifying the engine or governor, as this could create a safety hazard. Never operate the mower under the influence of drugs or alcohol. Always stop the engine before making any adjustments or performing maintenance.
Safety Alert Symbols Explained (Danger, Warning, Caution)
Understanding these symbols is critical for safe operation. DANGER indicates an imminently hazardous situation which, if not avoided, will result in severe injury or death. WARNING signifies a hazardous situation that could result in severe injury or death if not followed correctly.
The CAUTION symbol denotes a hazardous situation that could result in minor or moderate injury if not avoided. These alerts are accompanied by pictograms illustrating the specific hazard. Pay close attention to each symbol before operating the Hyper Tough mower.
The manual emphasizes that these symbols are not substitutes for good judgment and safe practices. Always read and understand the accompanying text to fully grasp the potential risks. Ignoring these warnings could lead to serious consequences.

Assembly Instructions
Carefully unpack all components and verify against the parts list. This section details attaching the handle, installing the grass catcher, and adjusting cutting heights for optimal performance.
Unboxing and Parts Identification
Upon receiving your Hyper Tough 20-inch lawn mower, carefully inspect the shipping carton for any signs of damage. Once confirmed, open the box and systematically remove all components. Cross-reference each part with the detailed parts list included within this manual and the separate parts diagram.
Key components to identify include: the mower deck, engine, handle assembly (upper and lower), grass catcher bag, discharge plug, wheels (typically four or seven depending on the model), and various hardware like bolts, nuts, and washers. Ensure all listed parts are present before proceeding. If any parts are missing or damaged, immediately contact Walmart customer support or refer to the warranty information provided. Proper identification of each component is crucial for a smooth and successful assembly process. Retain the packaging materials for potential returns or warranty claims.
Attaching the Handle
Begin handle attachment by aligning the lower handle section with the designated mounting points on the mower deck. Secure it using the provided bolts and washers, ensuring they are hand-tightened initially. Next, connect the upper handle to the lower section, again utilizing the supplied hardware.
Proper alignment is critical for comfortable operation. Once both sections are connected, fully tighten all bolts with a wrench, but avoid over-tightening, which could damage the components. Verify the handle’s stability by applying gentle pressure. The handle should feel secure and not wobble. Pay attention to any cable routing – ensure cables aren’t pinched or obstructed during handle installation. A correctly attached handle provides optimal control and maneuverability during mowing. Refer to the parts diagram if you encounter any difficulties during this step.
Installing the Grass Catcher
Begin grass catcher installation by locating the mounting brackets on the rear of the mower deck. Carefully align the grass catcher frame with these brackets, ensuring a snug fit. Secure the catcher using the provided retaining pins or clips – these typically snap or slide into place.
Confirm the catcher is firmly attached before operation; a loose catcher can detach during mowing, creating a safety hazard. Check for proper alignment to ensure efficient grass collection. Some models may have a full bag indicator; familiarize yourself with its function. Regularly empty the grass catcher to maintain optimal mowing performance and prevent clogging. Inspect the catcher for any damage before each use. Refer to the parts diagram for correct component placement if needed. A properly installed grass catcher keeps your lawn clean and tidy.
Adjusting Cutting Height
Adjusting the cutting height is crucial for achieving your desired lawn appearance. Locate the height adjustment levers, typically found near each wheel. These levers control the position of the mower deck. Select your preferred height by moving the levers to the corresponding notch – lower numbers indicate shorter grass.
Ensure all four wheels are set to the same height for an even cut. Test the setting on a small patch of lawn before mowing the entire area. Avoid drastically changing the height in a single pass, as this can strain the engine. Regularly check the adjustment levers to ensure they remain secure during operation. Refer to the manual’s diagram for specific lever locations and height settings. Proper height adjustment promotes healthy grass growth and a well-maintained lawn.

Operating Instructions
Mastering operation involves safe starting procedures, efficient mowing techniques, and proper shutdown protocols, all detailed within this manual for optimal performance.
Starting the Engine (Cold Start)
Before your initial cold start, ensure the fuel tank is filled with fresh gasoline and the oil level is correct, referencing the manual’s specifications. Prime the engine by pressing the primer bulb approximately 3-5 times until fuel is visible. Engage the blade control lever, holding it firmly against the handle. Slowly pull the starter rope with a smooth, controlled motion; avoid jerking.
If the engine doesn’t start on the first pull, repeat the priming and pulling process a few times. Once the engine sputters or attempts to start, continue pulling until it runs consistently. Release the blade control lever slowly to disengage the blade. Always follow the safety precautions outlined in the manual during the starting process, and never start the mower indoors or in a poorly ventilated area. Refer to the manual’s diagrams for precise component locations;
Starting the Engine (Warm Start)
When restarting a warm engine, priming is typically not required, as residual fuel remains in the carburetor. Ensure the blade control lever is firmly engaged against the handle for safety. Pull the starter rope with a swift, steady motion – a warm engine should start with less effort than a cold one.
If the engine hesitates, a single, gentle prime may assist, but avoid over-priming, which can flood the engine. Listen for consistent engine operation and release the blade control lever gradually. Always adhere to the safety guidelines detailed in the manual. Inspect the air filter regularly, as a clogged filter can hinder warm starts. The manual’s troubleshooting section provides further assistance if starting issues persist. Refer to the parts diagram for component identification.
Mowing Techniques for Optimal Results
Achieve a pristine lawn by overlapping each mowing pass by a few inches, preventing scalping and ensuring even coverage. Maintain a consistent walking pace for a uniform cut; rushing can lead to uneven results. Adjust the cutting height according to grass type and desired length – avoid removing more than one-third of the grass blade at a time.
Mow in a different direction each time to promote healthy growth and prevent soil compaction. For exceptionally tall grass, consider multiple passes at progressively lower heights. Regularly sharpen the blade, as a dull blade tears grass instead of cutting it cleanly. Consult the manual for blade sharpening instructions. Always prioritize safety and follow all operating guidelines.
Stopping the Engine and Shutdown Procedure
To safely stop the engine, first disengage the blade by releasing the blade control handle on the mower handle. Allow the blade to come to a complete stop before proceeding. Next, release the operator presence control (OPC) handle. If the engine fails to stop, immediately disconnect the spark plug wire to prevent accidental restarts.
For extended storage or maintenance, turn the fuel valve to the “OFF” position to prevent fuel leakage. Never attempt to adjust the carburetor or perform repairs while the engine is running. Always allow the engine to cool completely before handling or storing the mower. Refer to the manual for detailed shutdown instructions and safety precautions.
Maintenance & Troubleshooting
This section details routine upkeep like oil changes, blade sharpening, and air filter cleaning, alongside solutions for common issues like starting problems or uneven cuts.
Regular Maintenance Schedule
Maintaining peak performance requires a consistent maintenance routine. After each use, inspect the mower deck for debris and clean thoroughly. Every 25 hours of operation, or at least once per season, check and tighten all bolts and fasteners to ensure stability.
Crucially, inspect the air filter every 25 hours, cleaning or replacing it as needed to maintain optimal engine efficiency. Oil levels should be checked before each use, and the oil changed every 50 hours or annually, whichever comes first. Blade inspection and sharpening are vital; sharpen or replace blades whenever they become dull or damaged.
Finally, a thorough inspection of the entire mower, including cables and wheels, should be performed annually to identify and address any potential issues before they escalate. Following this schedule will prolong the life of your Hyper Tough mower.
Oil Change Procedure
To ensure optimal engine performance, change the oil every 50 hours of operation or annually. First, warm the engine by running the mower for a few minutes. Then, disconnect the spark plug wire for safety. Locate the oil drain plug, typically underneath the engine, and position a drain pan beneath it.
Remove the drain plug and allow the oil to drain completely. Reinstall the drain plug securely, then locate the oil fill cap. Using a funnel, slowly pour in the recommended oil type and quantity (refer to the specifications section). Check the oil level with the dipstick, adding more if needed.
Finally, reconnect the spark plug wire and start the engine to verify proper oil circulation. Dispose of the used oil responsibly at a designated recycling center.
Spark Plug Replacement
Maintaining a properly functioning spark plug is crucial for reliable engine starting and performance. Begin by disconnecting the spark plug wire to prevent accidental starting; Use a spark plug socket to carefully remove the old spark plug. Inspect the old plug for signs of wear, fouling, or damage – this can indicate engine issues.
Gap the new spark plug to the specification listed in the engine specifications section of this manual. Apply a small amount of anti-seize compound to the threads of the new plug. Carefully thread the new spark plug into the cylinder head by hand, then tighten it with the spark plug socket to the recommended torque.
Reconnect the spark plug wire securely. Start the engine to confirm proper operation. A properly replaced spark plug ensures efficient combustion and smooth running.
Air Filter Cleaning/Replacement
A clean air filter is vital for optimal engine performance and longevity. Regularly inspect the air filter for dirt and debris; For paper filters, gently tap it to remove loose particles, or use low-pressure compressed air, blowing from the inside out. Do not wash paper filters; replace them if heavily soiled.
Foam filters can be washed with mild soap and water, then allowed to dry completely before being lightly oiled. Ensure the filter is fully dry before reinstallation to prevent engine damage. Locate the air filter cover, remove it, and carefully remove the filter.
Install the clean or new filter, ensuring a proper seal. Reattach the air filter cover securely. A clean air filter allows for proper airflow, maximizing engine power and fuel efficiency.
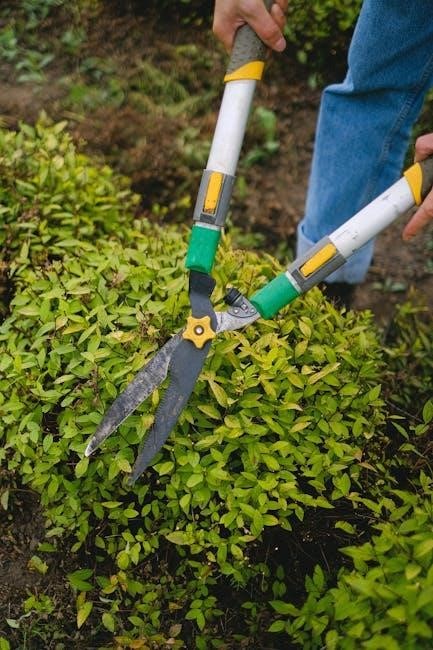
Blade Sharpening & Replacement
A sharp blade ensures a clean cut, promoting healthy grass growth and reducing strain on the engine. Disconnect the spark plug wire before performing any blade work for safety. Secure the blade with a block of wood to prevent rotation. Sharpen the blade using a metal file or a grinding wheel, maintaining the original angle.
Ensure balanced sharpening to avoid vibration. If the blade is severely damaged or worn, replace it with a new one. When replacing, ensure the blade is correctly oriented and securely tightened to the mower deck. Use the correct torque specifications.
Inspect the blade adapter for damage and replace if necessary. A dull or damaged blade can tear the grass, leading to brown tips and increased susceptibility to disease.
Troubleshooting Common Issues (Engine Won’t Start)
If the engine fails to start, first check the fuel level and ensure the fuel shut-off valve is open. Verify the spark plug wire is securely connected and the spark plug itself is clean and in good condition. A fouled spark plug should be replaced. Check the air filter; a clogged filter restricts airflow and prevents starting.
Ensure the safety bail is fully engaged while attempting to start the mower. If the engine cranks but doesn’t fire, the carburetor may be clogged and require cleaning or rebuilding; Low oil levels can also prevent starting; add oil to the correct level.
Consult the manual’s troubleshooting section for specific diagnostic steps and potential solutions. Persistent issues may require professional service.
Troubleshooting Common Issues (Uneven Cut)
An uneven cut often indicates a dull or damaged mower blade. Sharpen or replace the blade according to the manual’s instructions, ensuring proper balance. Check the tire pressure; uneven inflation can cause the deck to tilt, resulting in an uneven cut. Ensure the cutting height is appropriately adjusted for your lawn’s conditions.
Tall or dense grass can overwhelm the mower, leading to clumping and an uneven finish. Raise the cutting height and mow more frequently. Inspect the mower deck for obstructions or buildup of grass clippings, which can interfere with airflow and cutting performance.
Refer to the manual for detailed guidance on blade maintenance and deck cleaning. Consistent maintenance is key to achieving a consistently even cut.
Winter Storage Preparation

Proper winterization is crucial for preserving your Hyper Tough lawn mower. Before long-term storage, stabilize the fuel with a fuel stabilizer to prevent degradation and carburetor issues. Drain all fuel from the tank or run the engine until it stalls to eliminate fuel buildup. Remove the spark plug and pour a tablespoon of engine oil into the cylinder, then slowly pull the starter cord to distribute it.

Clean the mower deck thoroughly, removing all grass clippings and debris to prevent corrosion. Inspect and lubricate all moving parts, including wheels and cables. Store the mower in a dry, covered location, protected from the elements.
Consult the manual for specific winterization instructions related to your engine model.

Parts Diagram & Specifications
Explore detailed diagrams illustrating each component, alongside precise specifications including engine details (Briggs & Stratton e450), dimensions, weight, and comprehensive warranty information.
Detailed Parts List with Diagram
This section provides a comprehensive visual and textual breakdown of every component comprising your Hyper Tough 20-inch lawn mower. A clearly labeled diagram accompanies an exhaustive parts list, facilitating easy identification for maintenance, repairs, or replacements. Each part is assigned a unique number, cross-referenced with detailed descriptions and potential sourcing information.
The diagram showcases the mower’s assembly, highlighting key areas like the engine, cutting deck, wheel assemblies, handle, and grass catcher. The parts list details everything from bolts and screws to the blade, air filter, and spark plug. This resource is invaluable when ordering replacement parts, ensuring compatibility and a seamless repair process. Refer to the diagram alongside the list for accurate identification and proper installation. Maintaining a well-stocked supply of common parts can minimize downtime and keep your mower operating efficiently.
Engine Specifications (Briggs & Stratton e450)
The Hyper Tough 20-inch lawn mower is powered by a reliable Briggs & Stratton e450 series engine, known for its durability and performance. This engine boasts a displacement of 125cc, providing ample power for tackling typical residential lawns. It’s a four-stroke, OHV (Overhead Valve) engine with a forced air-cooling system, ensuring efficient operation even during extended use.

The e450 engine features a single-cylinder design and operates on unleaded gasoline with a minimum octane rating of 87. Key specifications include a bore of 3.125 inches and a stroke of 2.5 inches. The engine’s gross horsepower is approximately 4.5 ft-lbs of torque, delivering sufficient cutting power. Understanding these specifications is crucial for proper maintenance, such as oil changes and spark plug replacements, ensuring longevity and optimal performance of your lawn mower.
Mower Dimensions & Weight
The Hyper Tough 20-inch lawn mower is designed for maneuverability and ease of use, reflected in its compact dimensions and manageable weight. The overall width of the mower, including the cutting deck, is approximately 20 inches, allowing it to navigate tight spaces and around obstacles in your yard. Its length typically ranges around 53 inches, providing a good balance between cutting capacity and storage convenience.
Regarding weight, the Hyper Tough 20-inch mower generally weighs in at around 63 pounds. This relatively lightweight design makes it easier to push and control, even on inclines or uneven terrain. The height of the mower, with the handle in its upright position, is approximately 39 inches. These dimensions and weight contribute to the mower’s overall user-friendliness and suitability for a variety of lawn sizes and user preferences.
Warranty Information
Hyper Tough lawn mowers, including the 20-inch model, are backed by a manufacturer’s warranty to ensure customer satisfaction and peace of mind. Typically, the warranty covers defects in materials and workmanship for a specified period, often starting from the date of purchase. The standard warranty period is generally one year for the entire unit, encompassing parts and labor.
However, certain components, such as the engine (often a Briggs & Stratton e450), may have a separate, more extended warranty directly from the engine manufacturer. It’s crucial to retain your proof of purchase, such as a receipt or invoice, to validate any warranty claims. The warranty does not cover damage resulting from misuse, improper maintenance, or normal wear and tear. Refer to the complete warranty statement included within the owner’s manual PDF for detailed terms and conditions.
Leave a Reply
You must be logged in to post a comment.