


Howard Miller Clock Repair Manual: A Comprehensive Plan
This manual details Howard Miller clock restoration, covering mechanisms, common issues, and essential tools.
It guides disassembly, cleaning, repair, and reassembly, ensuring accurate timekeeping and chime functionality.
Gmail’s inbox is central for emails; understanding its components is crucial for efficient communication. Excel formulas calculate monthly time progress, aiding in project tracking.
Today’s date can be queried in various ways, focusing on the day of the week or the specific date. Proper lubrication is key for long-lasting clock performance.
Howard Miller clocks represent a legacy of American craftsmanship, renowned for their quality, precision, and elegant designs. Established in 1926, the company quickly became a leading manufacturer of both grandfather clocks and mantel clocks, often incorporating intricate chime mechanisms and beautiful wood cabinetry. Understanding the historical context and construction techniques is paramount when approaching Howard Miller clock repair.
These clocks, while generally robust, are susceptible to the effects of time, requiring periodic maintenance and occasional repair. Common issues stem from wear and tear on the movement, pendulum malfunctions, or problems with the chime system. A comprehensive repair manual is essential for both novice and experienced clock enthusiasts.
Gmail’s accessibility from computers and apps mirrors Howard Miller’s widespread appeal. Excel’s date calculations highlight the importance of precision, a hallmark of these timepieces. Knowing “what day is today” is less crucial than understanding the clock’s internal workings. Proper care ensures these clocks continue to mark time for generations.
This section provides a foundational overview of Howard Miller clocks, setting the stage for more detailed repair procedures.
II. Understanding Clock Mechanisms
Howard Miller clocks employ a variety of mechanisms, primarily weight-driven and pendulum-regulated movements. Weight-driven systems utilize descending weights to power the clock, while the pendulum controls the timekeeping rate. Understanding the interplay between these components is crucial for effective repair. The escapement mechanism, a critical element, releases the gears in a controlled manner, allowing the hands to advance.
Chime mechanisms, often complex, add another layer of intricacy. These systems utilize cams and hammers to strike bells or rods, producing melodic chimes. Proper lubrication is vital for smooth operation of all moving parts. Like Gmail’s inbox organization, each component has a specific function.
Excel’s formulas demonstrate precision, mirroring the clock’s accuracy. Knowing “what day is today” is irrelevant to the mechanism’s function. A thorough understanding of gear ratios, spring tensions, and pendulum swing is essential before attempting any repairs. This section details the fundamental principles governing Howard Miller clock mechanisms.
Familiarity with these principles will guide successful troubleshooting and restoration.
III. Common Howard Miller Clock Problems
Howard Miller clocks, while renowned for quality, are susceptible to several common issues. Pendulum stoppage is frequent, often caused by dirt, debris, or insufficient lubrication. Weight-driven mechanisms can experience binding due to worn cables or pulleys. Chime malfunctions, including incorrect striking or silence, are also prevalent, often stemming from cam or hammer misalignment.
Like understanding “what is the date today,” recognizing symptoms is the first step to diagnosis. Gear wear and tooth damage can lead to inaccurate timekeeping. Similar to Excel’s need for accurate formulas, clock gears require precision. Dust accumulation hinders movement, mirroring Gmail’s inbox clutter.
Another common problem is the clock running slow or fast, requiring pendulum adjustment. Broken suspension springs prevent pendulum oscillation. Identifying these issues early prevents further damage. This section outlines the most frequently encountered problems, providing a foundation for effective repair strategies.
Addressing these issues promptly ensures continued accurate timekeeping and chime functionality.
IV. Essential Tools for Howard Miller Clock Repair
Successful Howard Miller clock repair demands a specialized toolkit. Precision screwdrivers – both flathead and Phillips – are paramount for delicate adjustments. A mainspring winder is crucial for safely handling mainsprings, preventing injury and damage. Like Excel’s formulas needing correct inputs, clock repair requires the right tools.
Pin vises and staking sets facilitate pin removal and installation. A movement oiler ensures precise lubrication, akin to Gmail’s efficient email delivery. Magnifying glasses or visors aid in inspecting minute components; Cleaning solutions, specifically designed for clocks, are essential for removing grime.
A soft brush and lint-free cloths prevent scratching delicate surfaces. Dial and hand pullers safely remove these components. Digital calipers provide accurate measurements. Similar to understanding “what day is it today,” precision is key. Having these tools readily available streamlines the repair process and ensures professional results.
Investing in quality tools is vital for longevity and accuracy.

V. Disassembly of a Howard Miller Clock
Disassembly requires meticulous documentation. Before commencing, photograph each step – akin to Gmail archiving emails – for reassembly reference. Begin by carefully removing the clock face and hands (see section A). Gentle pressure is key; avoid forcing any components. Like calculating time progress in Excel, methodical steps are crucial.
Next, access the movement (see section B), typically secured with screws or clips. Disconnect the pendulum and weights, noting their positions. Support the movement during removal to prevent damage. Carefully detach chime rods and hammers, labeling each for correct placement.
As you disassemble, organize parts in labeled containers. Avoid mixing components from different sections; Remember, understanding “what day is it today” is simpler than reassembling a clock without documentation! Proceed slowly and deliberately, prioritizing preservation over speed. Proper disassembly is foundational for successful repair.
Patience and organization are paramount throughout this process.
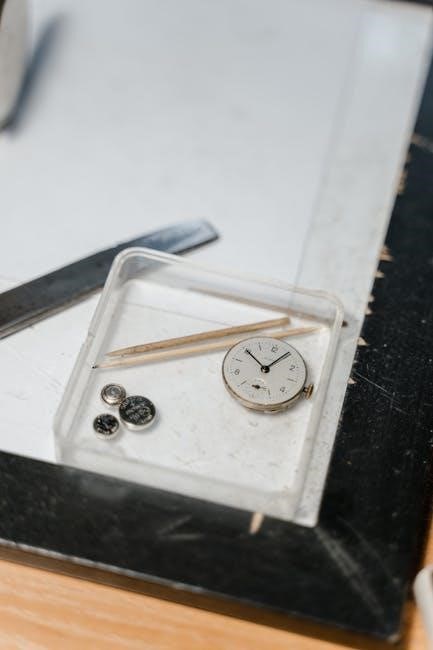
A. Removing the Clock Face and Hands
Removing the face and hands demands extreme care. Begin by protecting the clock face with a soft cloth – preventing scratches is vital. Locate the retaining nut on the center of the movement; gently loosen it. Like accessing emails in Gmail, a careful approach is essential.
Next, carefully lift the hands straight up, avoiding bending. Note their precise positions for accurate reassembly – documentation is key. If hands are stubborn, use a specialized hand puller tool. Avoid prying as this can cause damage. The hour hand typically requires more force than the minute hand.
Once the hands are removed, carefully lift off the clock face. Inspect the face for any damage or loose components. Remember, understanding “what is the date today” is easier than reattaching bent hands! Handle the face with clean hands to avoid smudging. Proceed slowly and methodically.
Gentle handling ensures the preservation of delicate components.
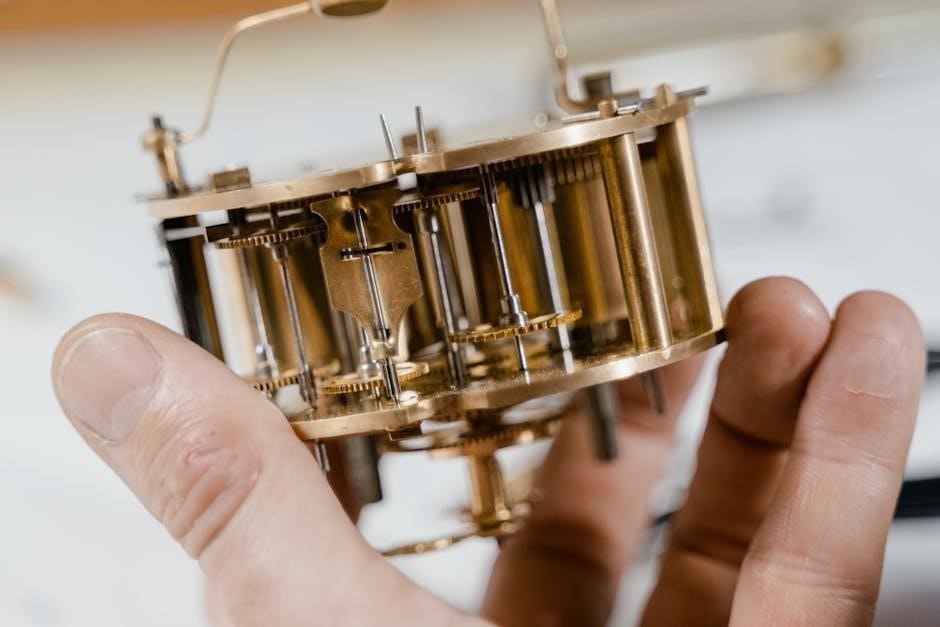
B. Accessing the Movement

After removing the face and hands, accessing the movement requires careful observation. Typically, the movement is secured with screws or retaining clips within the clock case. Locate these fasteners – they are often hidden. Like navigating Gmail’s inbox, a systematic approach is best.
Gently unscrew or release the clips, supporting the movement to prevent dropping. Note the orientation of the movement before removal – photographs are helpful. Be mindful of any connected wires or linkages, especially for chime mechanisms. Disconnect these carefully, labeling them if necessary.
Once free, carefully lift the movement from the case. Place it on a clean, padded surface to prevent damage. Remember Excel’s formulas for calculating time; precision is crucial here. Inspect the mounting points for any signs of wear or damage. Proceed with caution and patience.
A secure and stable workspace is essential for successful repair.
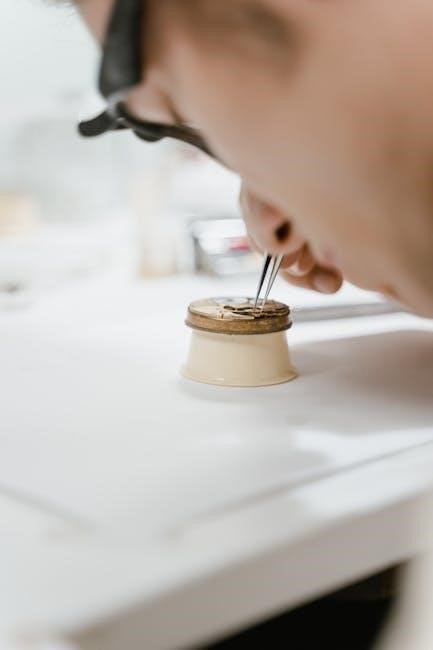
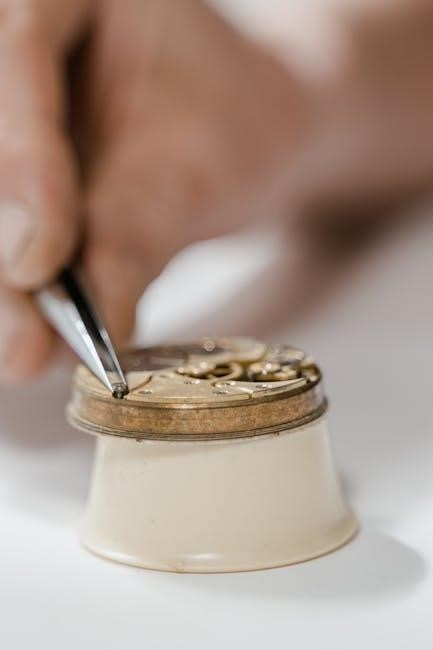
VI. Cleaning and Inspection of Clock Parts
Thorough cleaning is paramount before any repair work. Use a soft brush and a specialized clock cleaning solution – avoid harsh chemicals. Like organizing your Gmail inbox, a systematic approach is vital. Remove dust, dirt, and old lubricant from all components, including gears, pivots, and springs.
Inspect each part meticulously for wear, damage, or corrosion. Use a magnifying glass to examine pivots for flattening and gears for broken teeth. Check springs for cracks or loss of tension. Similar to Excel’s data validation, identify any anomalies.

Pay close attention to the chime mechanism components, as they are prone to wear. Document any findings – a detailed record is invaluable. Replace any severely damaged parts immediately. Ensure all parts are completely dry before reassembly.
A clean and well-inspected movement is the foundation of a successful repair.
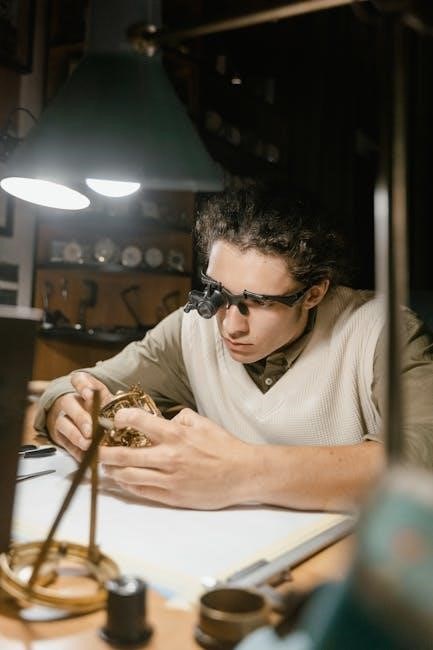
VII. Repairing the Clock Movement
Addressing movement issues requires precision and patience. Begin by carefully examining the escapement – the heart of the clock. Ensure the pallets engage smoothly with the escape wheel. Like managing your Gmail inbox, prioritize critical functions. Adjust the pallet depth if necessary to regulate the timekeeping.
For pendulum issues, verify the pendulum’s swing arc is correct and unobstructed. Check the suspension spring for damage. Weight-driven mechanisms require inspection of the cables and pulleys. Ensure smooth cable travel and proper weight alignment.
If gears are worn, consider bushing or replacement. Address any binding or friction within the gear train. Remember, a systematic approach, similar to Excel formulas, yields accurate results. Test the movement thoroughly after each adjustment.
A properly repaired movement ensures reliable timekeeping.
A. Fixing Pendulum Issues
Pendulum malfunctions often stem from simple causes; First, confirm the pendulum is hanging freely, without obstruction. Inspect the suspension spring – a common failure point – for kinks, breaks, or fatigue. Replacement is often necessary for optimal performance. Like organizing your Gmail inbox, address the most obvious issues first.
Verify the pendulum bob is securely attached and level. An uneven bob can disrupt the swing. Adjust the rating nut to fine-tune the clock’s speed; turning it clockwise slows the clock, counterclockwise speeds it up. Small adjustments are key – patience is vital.
Ensure the pendulum’s swing arc is appropriate. Too short, and the clock won’t run; too long, and it may be unstable. Consider the clock’s environment; drafts or uneven floors can affect pendulum swing. A stable, level surface is crucial.
B. Addressing Weight-Driven Mechanism Problems
Weight-driven clocks rely on consistent weight descent. Check the weight cables or chains for fraying, kinks, or obstructions. Ensure they run smoothly over the pulleys – lubrication is essential. Like managing your Gmail, preventative maintenance avoids larger issues. Inspect the winding drums for damage or debris.
Verify the weights are correctly positioned and of appropriate weight for the clock. Incorrect weights disrupt timing. Examine the pawls and ratchet wheels that control the weight descent; they should engage and disengage cleanly. Clean and lubricate these components carefully.
If the clock stops mid-week, the weights may be binding. Slowly raise and lower the weights to identify any sticking points. Adjust the cable guides if necessary. Remember Excel’s time progress formulas; consistent descent is key to accurate timekeeping.
VIII. Replacing Worn Parts
Identifying worn parts is crucial for restoration. Common replacements include bushings, pivots, and suspension springs. Like troubleshooting Gmail inbox issues, pinpointing the source of the problem is the first step. Source replacement parts from reputable suppliers specializing in Howard Miller clocks to ensure compatibility.
Carefully remove the old part using appropriate tools, avoiding damage to surrounding components. Clean the area thoroughly before installing the new part. Lubricate the new part before installation, following the manufacturer’s recommendations. Ensure proper alignment and secure fastening.
Consider replacing worn gears if they exhibit significant wear or damage. This requires precise alignment and potentially professional assistance. Remember Excel’s formulas for calculating progress; new parts restore functionality. Test the clock thoroughly after replacing any parts to verify proper operation.
IX. Howard Miller Chime Mechanism Repair
Chime mechanism repair demands precision. Common issues include stuck hammers, incorrect sequencing, or muffled sounds. Like understanding today’s date, knowing the chime sequence is vital. Begin by carefully inspecting the chime rods for damage or corrosion. Clean the rods and ensure free movement.
Examine the chime hammer assembly for proper alignment and lubrication. Adjust the hammer’s position to strike the rods cleanly. Check the rack and snail mechanism for wear or damage, as these control the chime sequence. Lubricate moving parts with clock oil.
If the chime sequence is incorrect, carefully adjust the snail’s position. Refer to the clock’s schematic for the correct sequence. Like tracking time in Excel, chime accuracy is essential. Test the chime mechanism thoroughly after any adjustments or repairs.
X. Lubrication of Clock Components
Proper lubrication is paramount for longevity. Use only high-quality clock oil, avoiding thick oils that attract dust. Like Gmail’s smooth operation, lubrication ensures seamless movement. Apply oil sparingly to pivot points, gears, and the pendulum suspension spring.
Focus on areas with friction, such as the escape wheel and pallet fork. Avoid over-lubrication, as excess oil can trap dirt. Inspect oil paths to ensure adequate distribution. Remember, understanding the day requires consistent motion, mirroring the need for consistent lubrication.
Clean components before oiling to remove old, hardened lubricant. Use a soft brush to apply oil precisely. Regular lubrication prevents wear and tear, maintaining accuracy. Like calculating time progress in Excel, consistent care yields reliable results.
XI; Reassembly of the Clock
Reassembly demands meticulous attention to detail. Begin by carefully positioning the movement within the case, ensuring proper alignment. Like organizing your Gmail inbox, a systematic approach is crucial. Reattach the pendulum and weights, verifying their secure connection.
Gently install the clock face and hands, aligning them correctly with the movement. Avoid forcing any components, as this can cause damage. Refer to disassembly notes or photographs for guidance. Understanding the date requires precise positioning, just as clock parts do.
Double-check all connections before fully securing the clock. Ensure free movement of all parts without binding. Like Excel formulas, each component must function in harmony. Final adjustments will be made during calibration.
XII. Adjusting and Calibrating the Clock
Calibration is vital for accurate timekeeping. Begin by observing the clock’s performance over a 24-hour period. Like tracking time progress in Excel, monitor for gains or losses. Adjust the pendulum length to regulate the clock’s speed – lowering it speeds up the clock, raising it slows it down.
Fine-tune the beat adjustment lever for a consistent tick-tock sound. Ensure the chime mechanism operates correctly, synchronizing with the hour. Refer to the clock’s manual for specific calibration instructions. Understanding ‘what day is today’ is less important than accurate time.
Repeat the observation period after each adjustment. Patience is key; achieving perfect accuracy may require several iterations. Like a well-organized Gmail inbox, a calibrated clock provides reliable performance.
XIII. Troubleshooting Common Repair Issues
If the clock stops, first check the power source – weights fully descended or batteries depleted. A sluggish pendulum often indicates insufficient lubrication or obstruction. Ensure the clock is level; an uneven surface disrupts operation. Like diagnosing issues in Gmail, systematic checks are crucial.
Chime malfunctions can stem from a stuck hammer or a misaligned chime sequence. Inspect the chime rods for damage or corrosion. If the clock runs fast or slow, revisit the calibration process (Section XII). Remember ‘what is the date today’ won’t fix a mechanical problem!
Persistent issues may require professional attention. Document all troubleshooting steps for clarity. Like calculating time in Excel, methodical problem-solving yields results.
XIV. Finding Howard Miller Clock Repair Manuals & Resources
Official Howard Miller manuals are often available on their website, though older models may require searching. Online clock forums dedicated to antique timepieces are invaluable resources, offering shared knowledge and troubleshooting advice – akin to Gmail’s community support.
Antique clock repair shops frequently possess manuals or can direct you to sources. eBay and other auction sites sometimes list original Howard Miller documentation. Remember the importance of ‘today’s date’ when verifying manual revisions.

Books on clock repair provide general principles applicable to Howard Miller clocks. Like Excel’s formula assistance, these resources streamline the repair process. Always prioritize safety (Section XV) when working with clock mechanisms.
XV. Safety Precautions During Clock Repair
Always disconnect the clock from its power source before commencing any repair work. Wear safety glasses to protect your eyes from flying debris, especially during disassembly – similar to protecting your Gmail inbox from spam. Avoid using excessive force when handling delicate clock parts; gentle manipulation is key.
Work in a well-lit and ventilated area to ensure clear visibility and prevent inhalation of cleaning solvents. Be mindful of sharp edges on clock cases and movements. Like tracking time in Excel, precision minimizes risks.
Properly dispose of old lubricants and cleaning agents according to local regulations. If unsure about any step, consult a qualified clock repair professional – remembering ‘today’s’ knowledge is limited.
Leave a Reply
You must be logged in to post a comment.