

GE Profile Double Oven Manual: A Comprehensive Guide
Navigating this manual unlocks the full potential of your GE Profile double oven, offering detailed instructions for operation, maintenance, and troubleshooting.
Understanding Your GE Profile Double Oven
Your GE Profile double oven represents a significant investment in culinary convenience. This section provides a foundational understanding of its features and capabilities. Familiarize yourself with the unique aspects of a double oven configuration, allowing for simultaneous cooking at different temperatures or utilizing one oven for warming while the other bakes.
Locating the model and serial number is crucial for support and warranty claims. Understanding these numbers unlocks access to specific documentation and assistance tailored to your appliance. Proper operation ensures optimal performance and longevity.
Locating the Model and Serial Number
Identifying your GE Profile double oven’s model and serial numbers is essential for service, warranty claims, and accessing specific documentation. These numbers are typically found on a metal tag. For double wall ovens, check inside the oven frame, often visible when the door is fully open, on either the left or right side.
Sometimes, the tag resides behind the control panel or on the back of the appliance. Keep this information readily available for future reference and support needs.
Where to Find the Model Number
The model number for your GE Profile double oven is crucial for accurate support and parts ordering. Begin by thoroughly inspecting the oven’s frame, typically located behind the oven door when fully opened. Look for a metal tag affixed to the left or right side.
On models featuring front control panels, the tag may be hidden within the frame, underneath the panel itself. Retaining this number ensures efficient assistance.
Decoding the Serial Number
Your GE Profile oven’s serial number provides valuable manufacturing information. It often follows a specific pattern, potentially revealing the year and location of production. A typical serial number, like HN314971G, contains coded data. While a complete breakdown isn’t publicly available, it aids GE in tracking production details.
This number, alongside the model number, is essential when contacting GE for service or warranty claims, ensuring accurate identification of your appliance.

Oven Control Panel Overview
The GE Profile oven’s control panel is your command center, featuring a display and control knobs for precise operation. The display showcases settings, temperature, and cooking time. Control knobs allow for easy selection of cooking modes, temperature adjustments, and timer settings. Familiarize yourself with these features to maximize your cooking experience.
Understanding the indicators and functions will unlock the oven’s full potential, ensuring optimal performance and convenience.
Display Features and Indicators
The GE Profile oven display provides crucial information at a glance. Expect to see the current oven temperature, remaining cook time, and selected cooking mode clearly illuminated. Indicators signal preheating status, self-clean cycle progress, and any active error codes. These visual cues ensure you’re always informed about the oven’s operation.
Pay close attention to these indicators for safe and efficient cooking, allowing for precise control and monitoring.
Control Knob Functions
The control knobs on your GE Profile oven offer intuitive operation. Typically, one knob selects the oven (upper or lower), while another manages cooking functions like Bake, Convection Bake, or Broil. A third knob adjusts temperature and cook time. Rotating these knobs provides precise control.
Some models may feature a dedicated self-clean knob. Familiarize yourself with each knob’s function for seamless operation and optimal cooking results.
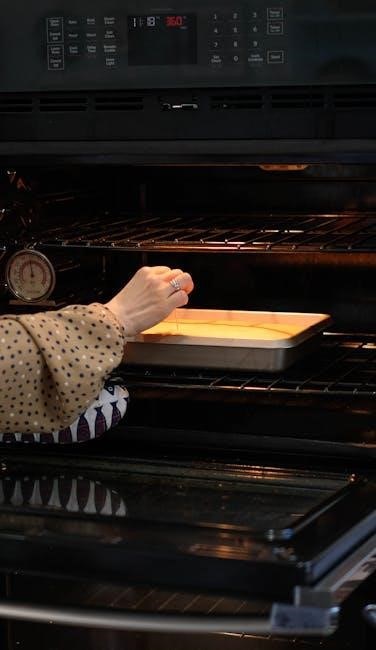
Basic Oven Operation
Operating your GE Profile double oven is straightforward. Begin by selecting the desired oven – upper, lower, or both. Next, set the cooking mode using the control knob (Bake, Convection, Broil). Accurate temperature setting is crucial; use the knob to specify your desired heat.
Preheating ensures consistent results; allow the oven to reach temperature before adding food. Always consult recipes for specific temperature and time guidelines.
Preheating the Oven
Proper preheating is vital for optimal baking results. Select your desired cooking mode – Bake or Convection – and set the required temperature using the control knob. The oven will begin heating, and the display will indicate progress.
Allow sufficient time for the oven to reach the set temperature before placing food inside; a preheat signal will often indicate readiness. Consistent preheating ensures even cooking and accurate recipe outcomes.
Setting the Temperature
Adjusting the oven temperature is straightforward using the control knob. Rotate the knob clockwise to increase the temperature and counterclockwise to decrease it. The display will show the selected temperature in real-time.
Ensure the temperature aligns with your recipe’s specifications for best results. Some models offer precise temperature control, allowing for adjustments in small increments. Always double-check before starting to cook!
Cooking Modes Explained
Your GE Profile double oven boasts versatile cooking modes designed for various culinary needs. Bake Mode provides consistent heat for standard baking tasks. Convection Bake utilizes a fan for faster, more even cooking – ideal for multiple racks.
Broil Mode delivers intense, direct heat from above, perfect for browning and searing. Explore each mode to unlock optimal results for every dish, ensuring perfectly cooked meals every time.
Bake Mode: Standard Baking

Bake Mode is your go-to for traditional oven cooking, utilizing heat from the bottom element for consistent results. This mode is perfect for cakes, cookies, casseroles, and roasting meats. Ensure even cooking by positioning food in the center of the oven.
Preheating is recommended for optimal baking. Adjust rack positions as needed based on recipe instructions. Bake Mode delivers reliable performance for everyday cooking tasks.
Convection Bake: Faster, Even Cooking
Convection Bake utilizes a fan to circulate hot air, resulting in faster and more even cooking compared to standard Bake Mode. This is ideal for baking multiple trays of cookies simultaneously or roasting larger cuts of meat. Reduce cooking time and temperature slightly when using Convection Bake.
Avoid opening the oven door frequently during convection baking to maintain consistent temperatures and optimal results.
Broil Mode: High-Heat Browning
Broil Mode delivers intense, direct heat from the top element, perfect for browning, searing, and finishing dishes. Position the oven rack appropriately – closer for more intense browning, further away for gentler results. Always keep the oven door slightly ajar during broiling to prevent overheating and ensure proper ventilation.
Monitor food closely while broiling, as it can burn quickly. Use broil-safe cookware only.
Self-Cleaning Cycle
The Self-Cleaning cycle utilizes extremely high temperatures to burn away food residue, eliminating the need for manual scrubbing. Before initiating, remove all racks, cookware, and any loose debris. Ensure proper ventilation by opening windows. Select your desired cleaning option – light, medium, or heavy – based on soil level.
The door will automatically lock during the cycle and remain locked until cool down is complete.

Preparing for the Self-Clean Cycle
Prior to initiating the Self-Clean cycle, meticulous preparation is crucial for optimal results and safety. Remove all baking stones, racks, aluminum foil, and any cookware from both the upper and lower oven cavities. Wipe up any large spills or excessive grease to minimize smoke. Ensure the oven door can fully close and latch securely.
Consider opening windows for ventilation, as the process can generate odors.
Understanding Self-Clean Options
Your GE Profile double oven offers varied Self-Clean options to suit your needs. A standard cycle, typically lasting several hours, tackles heavy soil buildup. A light cycle is suitable for minimal residue, completing faster. Some models feature a steam clean option for quick, everyday maintenance.
Always review the manual for specific cycle durations and recommendations. Remember to lock the control panel during the self-clean cycle to prevent accidental interruption.
Troubleshooting Common Issues
Encountering issues with your GE Profile double oven can be frustrating. Common problems include failure to heat, often due to a tripped breaker or faulty igniter. Error codes displayed on the control panel provide valuable diagnostic clues; consult the manual for specific meanings. If the oven isn’t heating, verify power supply and settings.
For persistent issues, or unfamiliar error codes, contacting GE appliance support is recommended for professional assistance.
Oven Not Heating
If your GE Profile oven isn’t heating, several factors could be at play. First, check the circuit breaker or fuse box to ensure a stable power supply. Verify the oven is set to an appropriate cooking mode and temperature. A faulty igniter, heating element, or temperature sensor can also prevent heating.
Inspect for error codes displayed on the control panel, referencing the manual for diagnosis. If issues persist, professional repair is advised.
Error Codes and Their Meanings
GE Profile ovens utilize error codes to signal specific malfunctions. These codes, displayed on the control panel, pinpoint the source of the problem, aiding in troubleshooting. Common codes relate to temperature sensor failures, heating element issues, or control board errors.
Consult your oven’s manual for a comprehensive list and detailed explanations of each code. Ignoring error codes can lead to further damage; professional service may be required.

Double Oven Specific Features
GE Profile double ovens offer unique functionalities maximizing cooking versatility. Utilize both ovens simultaneously for varied dishes or large-scale meal preparation. The synchronized baking feature ensures identical settings across both cavities, ideal for consistent results.
Explore independent temperature and mode control for each oven, optimizing cooking for different recipes. This dual-oven capability streamlines meal planning and enhances kitchen efficiency.
Using the Upper and Lower Ovens Simultaneously
Maximize efficiency by utilizing both the upper and lower ovens concurrently. This is perfect for preparing multiple dishes with differing temperature or mode requirements. For instance, bake a casserole in the lower oven while roasting vegetables in the upper.
Remember to adjust settings independently for each cavity, ensuring optimal cooking conditions for every recipe. This feature significantly reduces overall cooking time and streamlines meal preparation.
Synchronized Baking: Coordinating Both Ovens
The Synchronized Baking feature allows for seamless coordination between the upper and lower oven cavities, ensuring dishes finish cooking at the same time. This is ideal when preparing meals with varying cook times.
Simply set the desired finish time, and the ovens will automatically adjust start times to achieve synchronized completion. This eliminates the need for constant monitoring and guarantees a perfectly timed meal, simplifying your culinary experience.
Safety Precautions
Prioritize safety when operating your GE Profile double oven. Avoid touching heating elements during or immediately after use to prevent severe burns. Ensure adequate ventilation around the oven to dissipate heat effectively and prevent overheating.
Never use abrasive cleaners, as they can damage the oven’s surfaces. Always disconnect power before performing maintenance or cleaning. Keep flammable materials away from the oven, and supervise children when the appliance is in use.
Avoiding Burns and Electrical Hazards
Protect yourself from burns by exercising caution around hot surfaces. Never touch heating elements, oven racks, or the oven door immediately after cooking. Utilize oven mitts or pot holders when handling hot cookware.
To prevent electrical hazards, ensure the oven is properly grounded. Avoid using extension cords, and never operate the oven with a damaged cord or plug. Disconnect power before cleaning or servicing.
Proper Ventilation Requirements
Maintaining adequate ventilation is crucial for safe oven operation. Ensure the surrounding area is clear of combustible materials. Do not obstruct ventilation openings, as this can lead to overheating and potential fire hazards.
If your oven is installed near cabinetry, verify sufficient clearance exists as specified in the installation guide. Proper airflow ensures efficient performance and prevents moisture buildup, extending the oven’s lifespan.
Care and Maintenance
Regular care extends the life of your GE Profile double oven. Clean the interior after each use to prevent buildup. For the exterior, use a mild detergent and soft cloth – avoid abrasive cleaners.
Periodically inspect door seals for damage, ensuring a tight closure. Address spills promptly to avoid stubborn stains. Following these simple steps maintains optimal performance and preserves the oven’s aesthetic appeal for years to come.
Cleaning the Oven Interior
Maintaining a clean oven interior is crucial for performance and food safety. After cooling, wipe down surfaces with a damp cloth and mild detergent. For baked-on residue, utilize the self-clean cycle, preparing as instructed.
Avoid abrasive cleaners that can damage the enamel. Regularly cleaning prevents smoke and odors, ensuring consistently delicious results. Remember to remove racks before initiating the self-clean function for optimal cleaning.
Cleaning the Oven Exterior
Preserving the sleek appearance of your GE Profile oven requires regular exterior cleaning. Use a soft cloth dampened with warm, soapy water to wipe down the control panel, door, and surrounding surfaces.
Avoid harsh chemicals or abrasive pads, as they can scratch the finish. Stainless steel cleaners are recommended for stainless steel models. Promptly address spills to prevent staining and maintain a pristine look. A clean exterior enhances your kitchen’s aesthetic.
Replacing the Oven Light
A burnt-out oven light can hinder visibility during cooking. First, disconnect power to the oven at the breaker. Locate the oven light bulb, typically at the back of the oven cavity, often behind a protective cover.

Carefully remove the old bulb – it may be hot! Replace it with a bulb of the correct wattage (check your manual). Reattach the cover and restore power. A functioning oven light ensures optimal cooking observation.
Understanding Oven Racks and Accessories
Your GE Profile oven includes adjustable racks designed for versatile cooking. Position racks according to recipe instructions, ensuring proper heat circulation. Accessories like baking stones, broiler pans, and temperature probes enhance cooking performance.
Always center racks within the oven. Avoid overcrowding, which can impede airflow. Regularly clean racks to maintain optimal hygiene and prevent smoke. Proper rack placement and accessory use maximize your oven’s capabilities.
GE Profile Oven Warranty Information
Your GE Profile oven is protected by a manufacturer’s warranty, covering defects in materials and workmanship. The standard warranty typically lasts one year from the date of original purchase, with extended warranties available.
Review your warranty card, often found within the owner’s manual, for specific details and coverage limitations. Register your appliance online to streamline any future warranty claims. Keep proof of purchase for warranty service requests.
Finding Additional Resources
Beyond this manual, GE offers extensive support for your oven. The GE Appliances Website provides downloadable manuals, FAQs, and video tutorials. Online communities, like the r/Appliances subreddit on Reddit, are valuable for troubleshooting and sharing experiences with other owners.
Utilize reverse image searches with photos of your oven’s control panel or knobs to potentially identify the model. These resources can help resolve issues and maximize your oven’s functionality.
GE Appliances Website Support
GE Appliances’ official website is a central hub for owner resources. You’ll find downloadable owner’s manuals, detailed product specifications, and helpful frequently asked questions tailored to GE Profile ovens. Access video tutorials demonstrating various features and maintenance procedures.
Registration options allow personalized support and warranty information access. Explore parts ordering and service request options directly through the website for convenient assistance.
Online Forums and Communities (Reddit)
Reddit’s r/Appliances forum provides a valuable platform for GE Profile oven owners. Users share experiences, troubleshooting tips, and insights regarding model identification when serial numbers are missing. Discussions often cover repair solutions and navigating GE’s support system.
Reverse image searches of knobs and internal components are frequently suggested for model identification. This community-driven approach can offer unique solutions beyond official documentation.
Identifying Model Variations
GE Profile oven models exhibit subtle differences, making precise identification crucial for accurate manual access and parts ordering. Variations can stem from production years, features, or regional distribution – including Canadian models with unique specifications.
Comparing images online, particularly through Google Image Search, helps pinpoint specific models. Examining control panel features and knob designs also aids in differentiation, as does checking warranty cards for model details.
Differences Between GE Profile Oven Models
GE Profile ovens vary in features and design, even within the same generation. Some models boast advanced convection systems, while others prioritize specific cooking modes. Control panel layouts and knob styles also differ, impacting usability.
Canadian models may have unique certifications or features compared to US versions. Identifying these nuances is vital for finding the correct documentation and replacement parts, ensuring optimal performance and safety.
Reverse Image Search for Model Identification
When the model number is obscured, a reverse image search becomes invaluable. Capture a clear photograph of your GE Profile oven, focusing on unique design elements. Upload this image to Google Images or a similar search engine.

The search results may display matching models, revealing the correct number. This technique, suggested on Reddit, is particularly useful when dealing with scratched-off or illegible labels, offering a visual pathway to identification.
Using Knobs to Identify Model Numbers
If the oven’s data tag is inaccessible, examine the control knobs themselves. Reddit users suggest carefully removing a knob and inspecting its rear surface for imprinted part numbers. Photograph the knob clearly, isolating the number, and perform a reverse image search online.
This method can often reveal the corresponding model number, providing a crucial clue when the primary identification label is missing or damaged, aiding in finding relevant documentation.
Locating Tags Behind Control Panels
For GE Profile ovens with front control panels, the model and serial number tag isn’t always immediately visible. It’s frequently located behind the control panel itself. Carefully inspect the frame underneath the front controls; the tag may be affixed there.
Accessing this area might require gentle removal of the control panel—consult online resources for safe disassembly instructions before attempting this, ensuring you disconnect power first.
Canadian Model Variations
GE Profile ovens sold in Canada may exhibit subtle differences compared to their US counterparts. These variations can impact model and serial number formatting, potentially making identification more challenging. Some units might have unique codes or designations specific to the Canadian market.

If standard search methods fail, consider searching specifically for “GE Profile oven Canada” alongside any partial model numbers you’ve uncovered. Online forums suggest some units were exclusive to Canadian retailers.
Estimating Year of Manufacture
Determining the manufacture year can aid in identifying your GE Profile oven when the model number is missing. While not precise, the serial number offers clues. GE’s serial number system often incorporates date codes, though decoding can be complex and varies over time.
Generally, earlier digits may indicate the year or week of production. Comparing your serial number format with known GE patterns online might provide an estimated timeframe for your oven’s creation.
Leave a Reply
You must be logged in to post a comment.