
Cuisinart Coffee Maker and Grinder Manual: A Comprehensive Guide
This guide details operation of your Cuisinart Grind & Brew, covering setup, brewing with whole beans or pre-ground coffee, and essential maintenance procedures.
Welcome to the world of freshly ground and brewed coffee with your Cuisinart Grind & Brew! This automatic coffeemaker combines a conical burr grinder with a brewing system, delivering optimal flavor from whole beans. It’s designed for convenience, allowing you to wake up to the aroma of freshly brewed coffee thanks to the programmable Auto-On function.
Whether you prefer the simplicity of pre-ground coffee or the superior taste of freshly ground beans, this machine caters to your preferences. Understanding its features, as outlined in this manual, will ensure years of satisfying coffee experiences. Remember, coffee is 98% water, so water quality matters!
Understanding Your Coffee Maker Model (DGB-300 & Similar)
Your Cuisinart Grind & Brew (models DGB-300, DGB-300BK, and Grind & Brew Plus) is engineered for consistent performance. Key components include the bean hopper, grinder assembly, filter cup, water reservoir, and brewing basket. The control panel features buttons for power, Auto-On programming, and cup size selection (8oz, 10oz, 12oz).
This manual applies to similar models as well. Always refer to the detailed parts diagram on page 6 for specific component locations. Ensure the lid is securely in place for proper operation. Familiarize yourself with these elements to maximize your brewing experience.
Key Features and Components
The Cuisinart Grind & Brew boasts several features for convenient coffee preparation. These include a fully automatic grinding and brewing process, programmable 24-hour Auto-On, and multiple cup size options. Core components are the bean hopper (holds up to 100g), the conical burr grinder, and a reusable filter cup.
The brewing system includes a water reservoir and a brew basket. The control panel allows for easy operation. These features combine to deliver fresh, flavorful coffee with minimal effort, ensuring a delightful brewing experience every time.
Grinder Assembly Overview
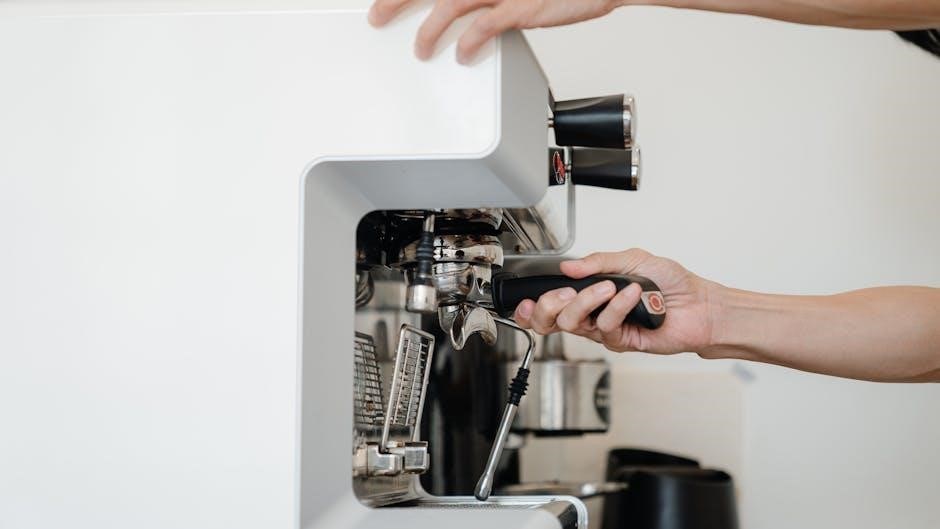
The grinder assembly is a crucial part of the Cuisinart Grind & Brew system. It features a conical burr grinder designed for consistent particle size, impacting flavor extraction. The bean hopper, lifting off for easy filling, holds up to 100g of coffee beans.
Coffee passes from the grinder into the filter basket below. Removing the grinder cover allows access for cleaning and removing any residual grounds. Proper assembly and cleaning are vital for optimal performance and preventing clogs. Refer to page 6 for a detailed drawing of the assembly.
Brewing System Breakdown
The Cuisinart brewing system efficiently delivers hot water over freshly ground or pre-ground coffee. Water is heated and then dispersed through a spray head, ensuring even saturation of the coffee grounds within the filter. The system accommodates various cup sizes – 8oz, 10oz, and 12oz – selectable via the control panel.
The brewed coffee then drips into the carafe, kept warm on the warming plate. The lid must be securely in place for the unit to operate correctly. This integrated system provides a convenient, all-in-one brewing experience.
Initial Setup and Preparation
Before your first brew, proper setup is crucial for optimal performance. Begin by removing all packaging materials and ensuring all parts are present. Thoroughly wash the carafe, filter basket, and reusable filter (if included) with warm, soapy water. It’s recommended to run a first-time use cleaning cycle with water only, without coffee grounds, to flush the system;
This removes any residual manufacturing residue. Following this, set the correct time and program the auto-on function according to your preferences for a ready-to-brew experience.
First-Time Use Cleaning Cycle
To ensure a fresh start, perform a cleaning cycle before the initial brew. Fill the water reservoir to the maximum fill line with fresh, clean water. Ensure the filter basket is in place, but do not add any coffee grounds. Close the lid securely – the unit won’t operate if it’s open. Press the power button to begin the brewing process.
Allow the entire cycle to complete, discarding the water afterward. This removes any potential residue from the manufacturing process, guaranteeing a pure coffee flavor from your very first cup.
Setting the Clock and Auto-On Function
Accurate timekeeping is crucial for the auto-on feature. Press and hold the “Hour” button to set the correct hour, then press “Minute” to adjust the minutes. The display will show the current time. To program the auto-on function, press the “Auto On” button. The display will flash. Use the “Hour” and “Minute” buttons to set your desired brew start time.
Press “Auto On” again to confirm. The indicator light will illuminate, confirming the function is active, ensuring fresh coffee awaits you!
Grinding Coffee Beans
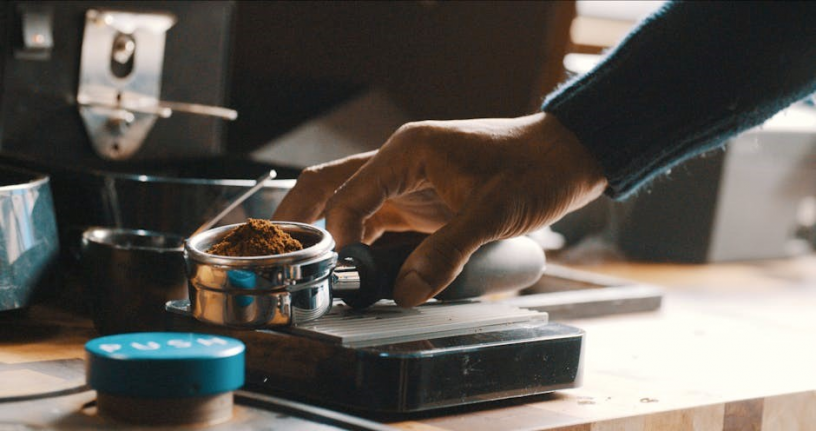
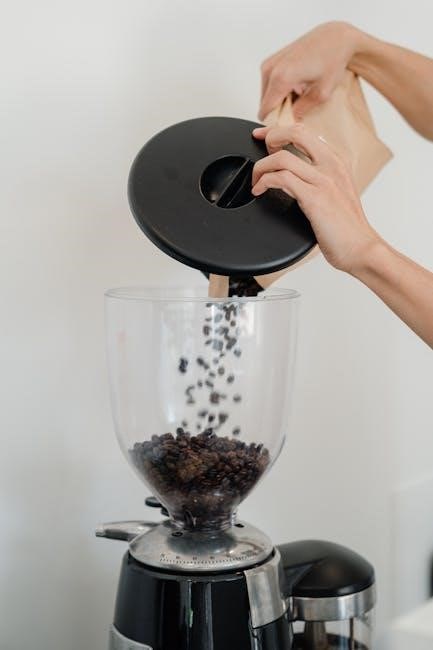
Freshly ground beans deliver the best flavor! Lift the grinder cover to access the bean hopper. It holds up to 100 grams of coffee beans. Ensure the hopper is dry and free of debris before adding beans. The Cuisinart Grind & Brew automatically grinds the beans immediately before brewing. This process optimizes aroma and taste. Avoid overfilling the hopper; it can impact grinding performance. Always replace the grinder cover securely before initiating the brewing cycle for safe operation.
Bean Capacity and Types
The bean hopper accommodates up to 100 grams of whole coffee beans, providing sufficient capacity for multiple brewing cycles. While most bean types work well, avoid oily beans as they can potentially clog the grinder. Medium-roasted beans are generally recommended for optimal flavor extraction. Experiment with different roasts and origins to discover your preference! Do not use flavored or decaffeinated beans exclusively, as they may leave residue. Always ensure beans are dry and free from foreign objects before adding them to the hopper.

Adjusting Grind Size – Coarse to Fine
The grind size selector allows you to customize the fineness of the coffee grounds, impacting the brew’s strength and flavor. A coarser grind is ideal for French presses, while a finer grind suits drip coffee makers like this Cuisinart model. Too fine a grind may clog the filter, hindering brewing. Start with a medium setting and adjust based on taste. Experimentation is key! Finer grinds extract more flavor, but can become bitter if over-extracted. Regularly check for and remove any coffee residue to maintain optimal grinding performance.
Grind Quantity Control
The Cuisinart Grind & Brew allows you to control the amount of coffee beans ground for each brew. This feature ensures you use the correct coffee-to-water ratio for your desired strength. The grinder holds up to 100g of beans, offering flexibility for single cups or full carafes. Use the selector to choose the appropriate amount based on the number of cups you’re brewing – referencing the markings for 4, 8, 12, or 16 ounces. Adjust the quantity to fine-tune the brew’s intensity to your personal preference.
Brewing Coffee
The Cuisinart Grind & Brew offers versatility in brewing methods. You can utilize whole bean coffee for a freshly ground experience, or opt for pre-ground coffee for convenience. When using whole beans, ensure the grinder is filled appropriately. Select from 8oz, 10oz, or 12oz cup size options to match your desired serving. The brewing process initiates after grinding is complete, automatically delivering coffee into the carafe. Remember, the lid must be in place for the unit to operate correctly, ensuring a safe and efficient brewing cycle.
Using Whole Bean Coffee
For the freshest flavor, utilize whole bean coffee with your Cuisinart Grind & Brew. Lift the grinder cover to access the bean hopper, which holds up to 100g of beans. Ensure the beans are dry and free of debris. After adding beans, replace the grinder cover and close the lid securely – the unit won’t operate without this. The grinder automatically grinds the beans immediately before brewing, maximizing aroma and taste. Select your desired cup size (8oz, 10oz, or 12oz) and press the power button to begin.
Using Pre-Ground Coffee
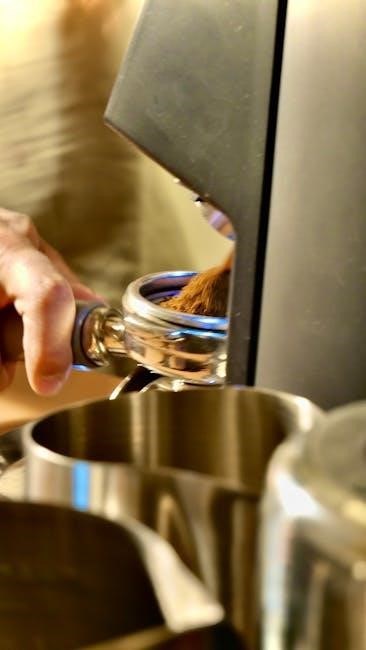
If you prefer pre-ground coffee, the Cuisinart Grind & Brew offers convenient flexibility. Ensure the coffee maker is turned off. Open the filter basket and insert a paper filter or the reusable filter cup. Add the desired amount of pre-ground coffee – a general guideline is one tablespoon per cup, adjusting to your taste. Close the filter basket securely. Select your preferred cup size (8oz, 10oz, or 12oz). Remember, the grinder will not operate when using pre-ground coffee; the brewing cycle will start directly after pressing the power button.
Cup Size Selection (8oz, 10oz, 12oz)
The Cuisinart Grind & Brew allows you to customize your brew strength based on your desired cup size. Before brewing, locate the cup size selection button on the control panel. Press the button repeatedly to cycle through the available options: 8oz, 10oz, and 12oz. The selected cup size will be indicated on the display. This feature ensures optimal water-to-coffee ratio for each serving. Markings for 4, 8, 12 and 16 ounces are present on the carafe, aiding in visual confirmation of your chosen brew volume.
Cleaning and Maintenance
Regular cleaning is crucial for maintaining optimal performance and extending the life of your Cuisinart Grind & Brew. Daily cleaning involves washing the carafe, filter basket, and reusable filter with warm, soapy water. See “Cleaning and Maintenance” on page 8 of the manual. Periodically, descale the coffee maker to remove mineral buildup, using a descaling solution or a mixture of water and vinegar. Thoroughly rinse after descaling. Don’t forget to clean the grinder to remove coffee residue, ensuring fresh flavor in every brew.
Daily Cleaning Procedures
After each use, promptly clean key components to prevent residue buildup. Wash the carafe, filter basket, and reusable filter cup with warm, soapy water. Ensure all soap is rinsed away thoroughly. Wipe down the exterior of the coffee maker with a damp cloth. Remove the Filter Cup from the grinder holder for cleaning. Regularly check the spray head for any blockages and clean as needed. These simple steps maintain hygiene and ensure consistently delicious coffee.
Regular Descaling Instructions
Descaling removes mineral buildup, crucial for optimal performance. Fill the water reservoir with a mixture of equal parts white vinegar and water. Run a full brewing cycle without coffee grounds. Repeat with fresh water two to three times to rinse thoroughly. This process, performed every 3-6 months depending on water hardness, ensures efficient heating and prevents damage. Lid must be in place for unit to operate during descaling. Consistent descaling extends the life of your Cuisinart coffee maker.
Grinder Cleaning – Removing Coffee Residue
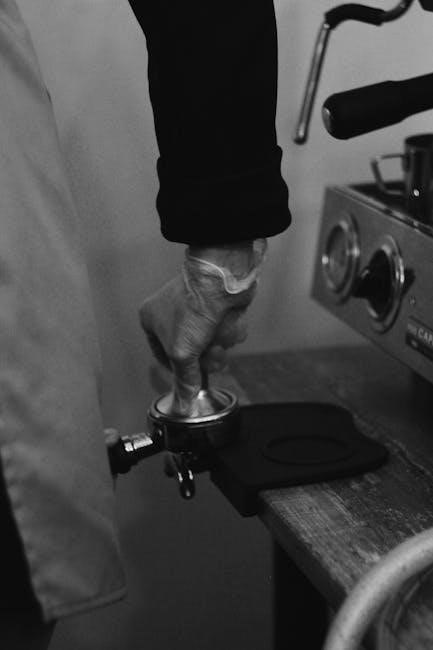
Regular grinder cleaning prevents stale coffee oils from affecting flavor. First, unplug the unit! Remove the grinder assembly and brush away loose grounds. Use a dry cloth or brush to wipe down the burrs – do not use water. For stubborn residue, a grinder cleaning brush is recommended. Ensure no debris remains before reassembling. A clean grinder delivers consistently fresh, flavorful coffee. Replace grinder cover and close lid securely before operation. Avoid excessive moisture during cleaning.
Troubleshooting Common Issues
If the coffee maker won’t turn on, check the power cord and outlet. Grinder not working? Ensure beans are loaded and the lid is securely closed – lid must be in place for unit to operate; Weak coffee may indicate insufficient grounds or a coarse grind setting. Strong coffee suggests too many grounds or a fine grind. Refer to the manual for adjusting grind size – coarse to fine. For persistent issues, consult Cuisinart’s website for resources and support.

Coffee Maker Not Turning On
If your Cuisinart Grind & Brew fails to power on, begin by verifying the power cord is firmly plugged into a functioning electrical outlet. Test the outlet with another device to confirm it’s delivering power. Inspect the power cord itself for any visible damage or fraying. Ensure the unit is assembled correctly, as the lid must be in place for unit to operate. If issues persist, consult the warranty information or visit www.cuisinart.com for further assistance and potential service options.
Grinder Not Working
Should the grinder fail to operate, first ensure there are sufficient coffee beans loaded – it holds up to 100g of beans; Verify the grinder cover is securely fastened; the unit won’t grind without it. A too fine a grind may also clog the filter, potentially halting the grinder. Check for any obstructions within the grinder chamber. If the grinder still doesn’t function, consult the detailed parts diagram on page 6 of the manual for proper assembly and troubleshooting steps. Contact Cuisinart support if needed.
Coffee Brewing Too Weak or Too Strong
Weak coffee often results from insufficient grounds. Increase the grind quantity control setting or use more coffee beans. Conversely, strong coffee indicates too many grounds; reduce the bean amount. Adjusting grind size – coarse to fine also impacts strength; a finer grind extracts more flavor. Ensure you’re selecting the appropriate cup size selection (8oz, 10oz, 12oz) for your desired brew strength. Remember, coffee is 98% water, so water quality also plays a crucial role in the final taste. Experiment to find your perfect balance!
Safety Precautions
Always ensure the appliance is unplugged before cleaning; Never immerse the coffee maker or grinder in water. Hot surfaces, like the carafe and brewing area, require caution to avoid burns. Operate correctly – the lid must be in place for unit to operate safely. Do not operate with a damaged cord or plug. Keep the appliance out of reach of children; Avoid using outdoors. Only use manufacturer-approved accessories. Regularly inspect for damage and discontinue use if any is found. Follow all warnings in this manual.
Warranty Information
Cuisinart provides a limited warranty on this Grind & Brew coffee maker. This warranty covers defects in materials and workmanship for a specified period from the date of original purchase. The warranty does not cover damage resulting from misuse, accidents, or unauthorized repairs. To obtain warranty service, contact Cuisinart customer support or visit www.cuisinart.com. Proof of purchase is required. Warranty details, including length and specific coverage, are outlined in the separate warranty document included with your appliance.
Frequently Asked Questions (FAQ)
Q: Why won’t my coffee maker turn on? Ensure the lid is securely in place, as a safety feature prevents operation without it. Q: Why isn’t the grinder working? Check for obstructions and ensure sufficient beans are loaded. Q: Can I use any type of coffee bean? Yes, but avoid oily beans as they may clog the grinder. Q: How often should I descale? Every 3-6 months, depending on water hardness. Q: Where can I find more support? Visit www.cuisinart.com for detailed resources.
Detailed Parts Diagram (Referencing Manual Page 6)
Page 6 of your Cuisinart Grind & Brew manual provides a comprehensive visual guide to the unit’s components. Key elements include the bean hopper, grinder assembly, filter cup, brew basket, water reservoir, and control panel. The diagram clearly illustrates the location of each part, aiding in cleaning and maintenance. Refer to this page when disassembling for grinder cleaning or replacing components. Understanding the layout simplifies troubleshooting and ensures proper reassembly, maximizing your coffee maker’s lifespan and performance.
Understanding the Control Panel
The Cuisinart Grind & Brew’s control panel features intuitive buttons for easy operation. The Power button initiates brewing or turns the unit off. The Auto-On button programs delayed brewing, setting the desired start time. Cup size selection – 8oz, 10oz, or 12oz – adjusts brew strength. The display shows the current time and programmed Auto-On settings. Familiarize yourself with each function for optimal control. Pressing the power button starts the grinding and brewing process automatically when using whole beans.
Power Button Functionality
The Power button serves as the primary control for your Cuisinart Grind & Brew. Pressing it initiates the brewing cycle, activating both the grinder and brewing system when whole beans are used. A single press also manually turns the coffeemaker on or off, independent of programmed settings. During operation, pressing the Power button again will not interrupt the brewing process. The unit automatically shuts off when grinding and brewing are complete, ensuring safety and energy conservation. Ensure the lid is securely in place for the unit to operate.
Auto-On Programming Details
The Auto-On function allows for pre-programmed brewing, ensuring fresh coffee is ready when you are. To set, press and hold the Auto-On button, then use the Hour and Minute buttons to set the desired start time. The display will show the programmed time, and a small indicator light illuminates when Auto-On is active. Ensure the coffee maker is filled with water and beans (or pre-ground coffee) before setting the Auto-On function. The brewer will automatically begin brewing at the programmed time.
Filter Cup Options – Reusable vs. Paper
Your Cuisinart Grind & Brew offers flexibility with filter options: a reusable filter cup and standard paper filters. The reusable filter, like the HomeBarista option, provides convenience and reduces waste, requiring only rinsing after each use. Paper filters offer a cleaner brew, trapping more oils and sediment. When using paper filters, ensure they are the correct size and placed properly within the filter basket. Both options deliver excellent coffee; the choice depends on your preference for flavor and convenience.
Water Quality and its Impact on Taste
The quality of water significantly impacts the final taste of your brewed coffee – remember, coffee is 98% water! Using filtered water is highly recommended to remove chlorine, minerals, and other impurities that can negatively affect the flavor profile. Avoid using distilled water, as it lacks the minerals needed for optimal extraction. Regular descaling (as detailed in the maintenance section) is crucial to prevent mineral buildup, ensuring consistent water flow and preserving the coffee’s true taste. Clean, fresh water is key to a delicious cup.
Operating Correctly – Lid and Cover Considerations
Proper lid and cover placement are essential for safe and effective operation of your Cuisinart Grind & Brew. The lid must be securely in place for the unit to operate; a safety mechanism prevents brewing if it’s open. Ensure the grinder cover is properly seated after adding beans, and that it’s closed during grinding and brewing. The cover lifts off easily to allow convenient bean addition. Always replace the grinder cover before initiating the brewing cycle. Operating correctly ensures optimal performance and prevents potential hazards.
Display Functions – Time and Auto-On Settings
The display panel on your Cuisinart Grind & Brew serves multiple functions, primarily showing the current time of day. It also clearly displays programmed Auto-On times, allowing for convenient, pre-set brewing. Setting the clock is crucial for accurate Auto-On functionality. The Auto-On feature enables you to schedule brewing in advance, ensuring fresh coffee is ready when you desire. The display illuminates when the unit is powered on, providing clear visibility of settings. Properly utilizing these functions maximizes the convenience of your coffee maker.
Manual Operation vs. Automatic Brewing
Your Cuisinart Grind & Brew offers both manual and automatic brewing options for flexibility. Manual operation involves pressing the power button to initiate grinding and brewing immediately, providing instant coffee. Automatic brewing utilizes the Auto-On function, allowing you to program a specific time for the coffee maker to start without intervention. This is ideal for wake-up coffee. Choosing between modes depends on your preference and schedule. Both methods deliver consistent results, but automatic brewing adds convenience and pre-planning capabilities.
Grind & Brew Plus Specific Features
The Grind & Brew Plus model enhances the standard features with several additions. It often includes a larger bean hopper, capable of holding up to 100g of beans, reducing refill frequency. Adjustable brew strength control allows for customizing coffee intensity. A specialized grind-off feature enables using pre-ground coffee exclusively. Improved water filtration contributes to better coffee taste. The Plus model may also feature a bolder display and refined control panel layout for enhanced usability and a more premium experience.
Resources and Support – Cuisinart Website
For comprehensive assistance with your Cuisinart Grind & Brew, the official Cuisinart website (www.cuisinart.com) is an invaluable resource. You can download user manuals for various models, including the DGB-300 and Grind & Brew Plus. Frequently Asked Questions (FAQs) address common issues. Access to replacement parts is available for purchase. Contact Cuisinart’s customer service via phone or email for personalized support. The website also offers helpful videos demonstrating setup, cleaning, and troubleshooting steps, ensuring optimal performance and longevity of your coffee maker.
Additional Tips and Hints for Optimal Performance
To maximize your Cuisinart Grind & Brew experience, use filtered water for the best taste. Regularly descale the machine – mineral buildup impacts brewing. Experiment with grind size; too fine can clog, too coarse yields weak coffee. Don’t overfill the bean hopper – 100g is the maximum. Ensure the lid is securely in place for operation. Clean the grinder after each use to remove residue. Consider a reusable filter cup for environmental benefits and richer flavor.
Leave a Reply
You must be logged in to post a comment.