


Honeywell T4 Installation Manual: A Comprehensive Plan
Embark on a seamless setup experience! This manual provides detailed instructions for installing and configuring your Honeywell T4 thermostat, ensuring optimal performance and comfort.
Welcome to enhanced home climate control! The Honeywell T4 Pro Smart Thermostat represents a significant upgrade in home comfort and energy management. This intelligent device learns your heating and cooling preferences, automatically adjusting temperatures to maximize efficiency and savings.
Designed for ease of use, the T4 boasts a vibrant touchscreen display and intuitive controls. Beyond basic temperature adjustments, it offers advanced features like geofencing, smart alerts, and remote access via the Honeywell Home app. This manual will guide you through every step of the installation process, from preparing your existing system to connecting to Wi-Fi and customizing your schedule. Prepare to experience a new world of possibilities!
Package Contents & Verification
Ensure a smooth installation by verifying all components are present! Your Honeywell T4 package should include the following: the T4 thermostat display unit, the T4 base plate, mounting screws and anchors, wire labels, and this installation manual.
Carefully unpack the box and inspect each item for any signs of damage during shipping. If any parts are missing or appear damaged, do not proceed with installation. Contact Honeywell support immediately for assistance and replacements. Proper verification now prevents delays and ensures a successful setup. Retain the original packaging for potential returns or warranty claims. A complete package guarantees a hassle-free experience!
Safety Precautions
Prioritize safety throughout the installation process! Always disconnect power to your HVAC system at the breaker box before beginning any wiring. Failure to do so could result in electrical shock or damage to your equipment. If you are uncomfortable working with electrical wiring, consult a qualified HVAC technician.

Wear appropriate safety glasses to protect your eyes from dust and debris. Be mindful of potential hazards like sharp edges on the base plate or screws. Keep small parts away from children. Do not attempt to modify or disassemble the thermostat beyond the instructions provided in this manual; Following these precautions will ensure a safe and successful installation experience, protecting both you and your HVAC system.
Tools Required for Installation
Gather these essential tools before you start! You will need a Phillips head screwdriver for mounting the base plate and connecting wires. A small flathead screwdriver may be helpful for terminal connections. Wire strippers are crucial for preparing the existing and new wires for secure connections.
A voltage tester is highly recommended to verify power is off before handling any wiring. A level will ensure the thermostat is mounted straight for aesthetic appeal and accurate readings. Pliers can assist with bending or manipulating wires. Finally, a digital camera or smartphone is useful for documenting the existing wiring configuration before disconnection – a vital step for correct re-installation!
System Compatibility Check
Ensure seamless integration with your existing setup! The Honeywell T4 is designed to work with most standard 24V heating and cooling systems. However, verifying compatibility is crucial before installation. Confirm your system isn’t a high-voltage system (110V or 220V) as the T4 is not compatible with these.
Check for a common wire (C-wire); it’s often required for consistent power. The T4 supports conventional HVAC systems, heat pumps, and dual-fuel systems. If you have a millivolt system, compatibility is unlikely. Carefully review your existing thermostat’s wiring to identify the wire functions – this will guide the installation process and prevent potential issues.
HVAC System Types Supported
Broad compatibility for diverse home comfort needs! The Honeywell T4 thermostat expertly supports a wide array of HVAC systems, ensuring versatile control. It’s fully compatible with conventional forced-air systems – furnaces and air conditioners – offering reliable heating and cooling.
Furthermore, the T4 seamlessly integrates with heat pump systems, including those with auxiliary or emergency heat. Dual-fuel systems, combining gas and electric heating, are also supported, optimizing energy efficiency. However, it’s not designed for use with 110V or 220V line voltage systems, or millivolt systems. Confirm your system type before proceeding with installation for optimal performance.
Voltage Requirements
Low-voltage operation for safety and ease of installation! The Honeywell T4 thermostat operates on a standard 24VAC (Volts Alternating Current) low-voltage system, commonly used in most residential HVAC setups. This low-voltage design ensures safe and straightforward installation, minimizing electrical hazards.

Crucially, the T4 is not compatible with line voltage systems (120V or 240V), which directly power heating elements. Attempting to connect the thermostat to a line voltage system will cause severe damage and poses a significant safety risk. Always verify your HVAC system’s voltage before installation. If you are unsure, consult a qualified HVAC technician to avoid potential issues and ensure a safe setup.
Wiring Diagram Overview
Understanding the connections is key to a successful installation! The Honeywell T4 utilizes a standard color-coded wiring system for compatibility with most HVAC systems. A typical diagram illustrates terminals for the Common wire (C), Heating (W), Cooling (Y), and Fan (G) connections, alongside the 24VAC power (R) terminal.
Carefully review the wiring diagram specific to your T4 model, as variations may exist. Proper wire identification is crucial; miswiring can lead to system malfunction or damage. The diagram clearly shows which wire connects to each terminal, ensuring a secure and functional setup. Always double-check your connections against the diagram before powering on the system.
Removing Your Old Thermostat
Safety first! Before beginning, absolutely power down your HVAC system at the breaker box to avoid electrical shock. Locate the breaker controlling your furnace or air handler and switch it to the “off” position. Once confirmed off, carefully remove the cover of your existing thermostat to expose the wiring terminals.
Crucially, before disconnecting any wires, use a smartphone or masking tape and a pen to clearly label each wire with its corresponding terminal designation (R, W, Y, G, C, etc.). This step is vital for accurate reconnection to the Honeywell T4. Take a photograph for extra assurance!
Powering Down the HVAC System
Prioritize safety! Disconnecting power is the most critical first step. Locate your electrical service panel – typically in a basement, garage, or utility closet. Identify the circuit breaker that controls your heating, ventilation, and air conditioning (HVAC) system. This is often labeled “Furnace” or “HVAC,” but may require some investigation.
Firmly switch the identified breaker to the “off” position. To verify power is completely off, use a non-contact voltage tester near the thermostat wires. Never proceed if voltage is detected. Confirming a complete power disconnect prevents electrical shock and potential damage to your equipment during installation.
Labeling Existing Wires
Avoid confusion! Before disconnecting any wires from your old thermostat, meticulous labeling is essential. Use the provided wire labels – or small pieces of masking tape and a pen – to clearly identify each wire’s function. Note the terminal letter it’s connected to on the old thermostat (e.g., R, W, Y, G, C).
Carefully wrap each label around the corresponding wire. Accurate labeling prevents incorrect wiring during the Honeywell T4 installation, which could damage your HVAC system. Double-check your labels against the old thermostat’s wiring diagram before proceeding. A photograph of the existing wiring can also serve as a valuable backup reference.
Connecting the Honeywell T4 Wiring
Precision is key! With the base plate mounted and wires labeled, carefully connect each wire to the corresponding terminal on the Honeywell T4 base. Refer to the wiring diagram included with your thermostat and the labels you applied earlier. Ensure each wire is securely inserted into the terminal – a gentle tug confirms a solid connection.
Avoid forcing wires; if a wire doesn’t easily insert, double-check the terminal letter and wire label. Incorrect wiring can lead to system malfunction or damage. Once all wires are connected, visually inspect them to confirm proper placement and secure connections before proceeding to the next step.
Common Wire (C-Wire) Importance
Powering your smart thermostat! The Common wire (C-wire) provides continuous power to the Honeywell T4, enabling its smart features and display. Many older HVAC systems lack a C-wire, but it’s often essential for reliable operation. Without a C-wire, the thermostat may draw power from other wires, causing intermittent issues like system cycling or unresponsive controls.
Solutions for no C-wire include using a C-wire adapter (often included or available separately) or running a new wire. Carefully follow the adapter’s instructions for proper installation. A stable power supply via the C-wire ensures consistent performance and unlocks the full potential of your Honeywell T4.
Identifying and Connecting Wires (R, W, Y, G)
Decoding your HVAC wiring! Correctly identifying and connecting the wires is crucial. The R wire provides power, W activates heating, Y controls cooling, and G operates the fan. Refer to your old thermostat’s wiring and the Honeywell T4’s wiring diagram. Match the wire labels carefully – incorrect connections can damage your system.

Securely connect each wire to the corresponding terminal on the T4 base plate. Ensure wires are firmly inserted and no bare wire is exposed. Double-check all connections before proceeding. If unsure, consult a qualified HVAC technician. Proper wiring guarantees safe and efficient operation of your heating and cooling system with the new thermostat.
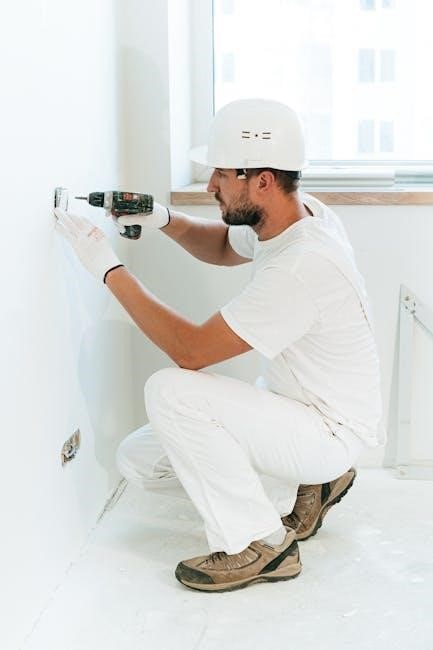
Mounting the Honeywell T4 Base Plate
Securely anchoring your thermostat! After wiring, carefully position the Honeywell T4 base plate on the wall where your old thermostat was located. Use the provided mounting screws and wall anchors (if needed) to firmly attach the base plate. Ensure it’s level for a professional appearance and proper display unit alignment.
Avoid placing the base plate in direct sunlight or near heat sources, as this could affect temperature readings. Gently tighten the screws – avoid over-tightening, which could damage the wall or the base plate. A stable and securely mounted base plate is essential for the reliable operation and longevity of your new Honeywell T4 thermostat system.
Attaching the Honeywell T4 Display Unit
Completing the installation process! Once the base plate is securely mounted, gently align the Honeywell T4 display unit with the base. It should slide or snap into place with a satisfying click, ensuring a firm and stable connection. Verify that the display unit is fully seated and flush against the base plate.
Do not force the display unit if it doesn’t align easily; double-check the base plate’s levelness and wiring connections. A properly attached display unit is crucial for clear visibility of settings and accurate temperature control. This final step brings your Honeywell T4 thermostat to life, ready for initial power-up and setup!
Initial Power-Up and Setup
Bringing your thermostat online! After attaching the display unit, restore power to your HVAC system at the breaker. The Honeywell T4 should power on automatically, initiating the initial setup sequence. Follow the on-screen prompts to select your language, date, and time settings.
Crucially, the thermostat will guide you through a system check, verifying proper wiring and component functionality. This process ensures accurate operation and prevents potential issues. Pay close attention to any error messages displayed during setup, as they indicate potential wiring problems or system incompatibilities. Successful completion of the initial setup prepares your T4 for Wi-Fi connection and personalized programming.
Wi-Fi Connection and App Setup
Unlock remote control! To leverage the full potential of your Honeywell T4, connect it to your home’s Wi-Fi network. On the thermostat display, navigate to the network settings and select your Wi-Fi network from the available list. Enter your password when prompted, ensuring a secure connection.
Next, download the Honeywell Home app (available on iOS and Android) and create an account. Follow the in-app instructions to add your T4 thermostat. This allows remote control, scheduling, and access to advanced features. The app provides real-time monitoring and control, enhancing convenience and energy savings. A stable Wi-Fi connection is vital for optimal app functionality.
Basic Programming and Scheduling
Customize your comfort! The Honeywell T4 allows for personalized temperature scheduling to optimize energy usage and maintain desired comfort levels. Through the thermostat interface or the Honeywell Home app, you can create custom schedules based on your daily routines.
Set different temperatures for various times of the day – for example, lower temperatures while you’re away at work and warmer temperatures before you arrive home. Utilize the “Hold” function for temporary overrides. Explore pre-programmed modes like “Home,” “Away,” and “Sleep” for quick adjustments. Regularly reviewing and adjusting your schedule ensures continued efficiency and comfort throughout the year.
Troubleshooting Common Installation Issues
Resolve setup hurdles! Encountering issues during installation is common. If the thermostat displays “No Power,” double-check the C-wire connection and breaker status. For incorrect temperature readings, verify proper thermostat placement, away from direct sunlight or drafts. Ensure all wiring connections are secure and match the wiring diagram.
If the system doesn’t respond, confirm compatibility with your HVAC system. A faulty wire connection can also cause problems; re-examine each wire. Consult the error code section for specific diagnostics. If issues persist, refer to the Honeywell support website or contact a qualified HVAC technician for assistance. Careful review and methodical checking are key to a successful installation.
No Power to the Thermostat
Diagnose power loss! If your Honeywell T4 isn’t powering on, the first step is verifying the breaker supplying power to your HVAC system hasn’t tripped. Next, meticulously inspect the C-wire connection – a missing or improperly connected common wire is a frequent cause. Ensure the wire is securely fastened to the ‘C’ terminal on both the thermostat base and the furnace control board.
Confirm voltage is reaching the thermostat using a multimeter. If voltage is present at the ‘R’ terminal but not the ‘C’, investigate wiring issues back to the furnace. A disconnected or damaged wire can prevent power flow. Double-check all connections and consult a qualified technician if the problem persists.
Incorrect Temperature Readings
Address inaccurate readings! If your Honeywell T4 displays an incorrect temperature, begin by ensuring the thermostat isn’t directly exposed to sunlight, drafts, or heat-generating appliances. These external factors can significantly skew readings. Verify the thermostat is level; an unlevel installation can affect sensor accuracy.
Calibrate the temperature within the thermostat’s settings menu. Most Honeywell T4 models allow for temperature offset adjustments. If calibration doesn’t resolve the issue, check for obstructions blocking airflow around the thermostat. Consider relocating the thermostat to a more representative location within your home for consistent, reliable temperature monitoring.
Understanding Error Codes

Decode the signals! Your Honeywell T4 thermostat utilizes error codes to diagnose system issues. These codes, displayed on the screen, pinpoint problems ranging from wiring faults to HVAC system malfunctions. A common code, “E1,” often indicates a loss of communication with the heating or cooling equipment. “E2” might signal a sensor failure, while “E3” could point to a low battery issue (if applicable).
Consult the full error code list within the Honeywell T4 manual or on the Honeywell Home website. Each code has a specific meaning and recommended troubleshooting steps. Ignoring error codes can lead to further system damage, so prompt attention is crucial for maintaining optimal performance and preventing costly repairs.
Resetting the Honeywell T4 Thermostat
Restore to factory settings! Resetting your Honeywell T4 can resolve minor software glitches or clear incorrect programming. A soft reset, achieved by powering the thermostat off and on, often resolves temporary issues. For a complete factory reset, navigate to the settings menu on the thermostat display.
Locate the “Reset” or “Factory Defaults” option, typically found under “Advanced” or “System” settings. Confirm your choice, as this will erase all personalized settings, schedules, and Wi-Fi connections. After the reset, you’ll need to reconfigure the thermostat from scratch. This process ensures a clean slate for optimal operation and troubleshooting.
Advanced Features and Settings
Unlock full potential! The Honeywell T4 offers a range of advanced features beyond basic temperature control. Explore geofencing, which adjusts settings based on your location, maximizing energy savings when you’re away. Customize fan settings for continuous air circulation or utilize smart alerts for filter change reminders and system malfunctions.
Delve into detailed scheduling options, creating unique programs for each day of the week. Access energy usage reports via the Honeywell Home app to monitor consumption patterns and identify areas for improvement. Configure vacation mode for extended absences, ensuring efficient operation while you’re away. These features elevate your comfort and control.
Warranty Information and Support
Rest assured with our commitment! Your Honeywell T4 thermostat is backed by a one-year limited warranty against manufacturing defects. This warranty covers component failures under normal use, ensuring peace of mind. For detailed warranty terms and conditions, please visit the Honeywell Home website or consult the included warranty documentation;
Need assistance? Honeywell offers comprehensive support resources. Access our online knowledge base for frequently asked questions and troubleshooting guides. Contact our dedicated support team via phone or email for personalized assistance. Explore community forums for peer-to-peer support and shared experiences. We’re here to help!
Leave a Reply
You must be logged in to post a comment.