


Honeywell T6 Pro Z-Wave Installation Manual: A Comprehensive Guide
This manual provides detailed instructions for installing and configuring your Honeywell T6 Pro Z-Wave thermostat, ensuring seamless integration with your Z-Wave network.
It covers everything from initial setup and wiring to advanced features like geofencing and smart home integration, maximizing energy savings and comfort.
Understanding proxy server ports (80, 8080, 3128) is crucial for optimal network performance and security when utilizing advanced features.
This guide will help you navigate the installation process, troubleshoot common issues, and access Honeywell support for any assistance needed during setup.
Understanding the Honeywell T6 Pro Z-Wave Thermostat
The Honeywell T6 Pro Z-Wave thermostat represents a significant advancement in home climate control, seamlessly blending user-friendly programming with the robust capabilities of Z-Wave Plus technology. This thermostat isn’t merely a temperature regulator; it’s a central component of a smart home ecosystem, designed to deliver both energy savings and enhanced comfort.
Certified Z-Wave Plus, it guarantees interoperability with a wide range of Z-Wave controllers and gateways, simplifying integration into existing smart home setups. The T6 Pro offers programmable schedules, remote access, and compatibility with geofencing features, allowing for customized climate control based on occupancy and preferences.
Furthermore, understanding its communication protocols, including potential proxy server port configurations like 80, 8080, and 3128, is key to optimizing network performance. This thermostat empowers users to take control of their home environment, reducing energy consumption and creating a more comfortable living space.
Z-Wave Compatibility and Requirements
To successfully integrate the Honeywell T6 Pro Z-Wave thermostat, a compatible Z-Wave network is essential. This requires a functioning Z-Wave controller or hub, such as SmartThings or Hubitat, acting as the central communication point. The thermostat utilizes Z-Wave Plus, ensuring enhanced range, reliability, and security compared to older Z-Wave standards.
Your Z-Wave network must operate on the 908.42 MHz frequency (US) or the appropriate frequency for your region. Ensure your controller supports Z-Wave Plus devices and has sufficient capacity to accommodate additional nodes. Understanding proxy server configurations, potentially involving ports 80, 8080, or 3128, may be necessary for certain network setups.
Finally, a stable internet connection is recommended for remote access and cloud-based features. Verify your controller’s firmware is up-to-date for optimal compatibility and performance with the T6 Pro Z-Wave.
Package Contents and Initial Inspection
Upon receiving your Honeywell T6 Pro Z-Wave thermostat, carefully inspect the package for any signs of damage during shipping. The box should contain the T6 Pro Z-Wave thermostat unit itself, a mounting base plate, screws and wall anchors for installation, and this comprehensive installation manual.
Additionally, you should find wire labels to aid in identifying existing thermostat wiring. Verify all listed components are present. If anything is missing or appears damaged, immediately contact Honeywell support or your point of purchase.
Before proceeding with installation, familiarize yourself with the thermostat’s components and the included hardware. Note the port configurations, though not directly relevant to initial inspection, may be important later. A thorough initial inspection ensures a smooth and trouble-free installation process.

Installation Process
This section details the physical installation of your Honeywell T6 Pro Z-Wave thermostat, covering safety precautions, old thermostat removal, and wiring procedures for a secure setup.
Safety Precautions Before Installation
Crucially, before beginning the installation of your Honeywell T6 Pro Z-Wave thermostat, always disconnect power to your heating and cooling system at the breaker box. This prevents electrical shock and potential damage to the thermostat or your HVAC equipment. Confirm the power is off using a non-contact voltage tester.
Carefully read all instructions and warnings included in this manual and with your HVAC system. If you are uncomfortable with electrical wiring, consult a qualified HVAC technician. Improper wiring can lead to system malfunction or safety hazards.
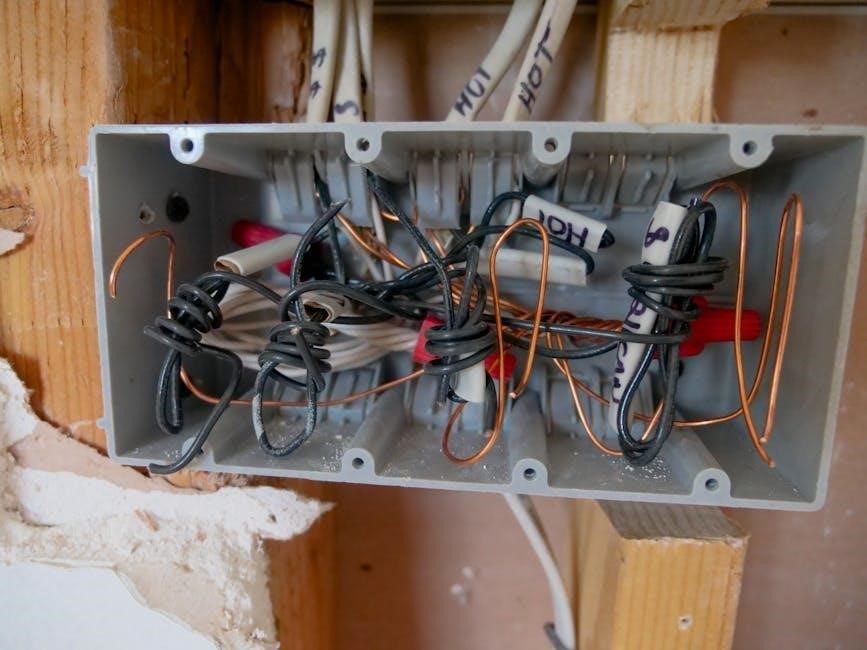
Be mindful of existing wiring; take a photograph of the current thermostat wiring configuration before disconnecting anything. This serves as a valuable reference during the installation process. Avoid touching any bare wires. Ensure the work area is well-lit and free of obstructions.
Always adhere to local electrical codes and regulations during installation.
Removing Your Old Thermostat
Before disconnecting any wires, carefully label each wire with the corresponding terminal designation on your old thermostat. Use the provided wire labels or create your own, ensuring clear and accurate identification. A photograph of the existing wiring is also highly recommended as a backup reference.
Gently pull the thermostat cover off the wall plate. Depending on the model, this may involve snapping it off or loosening screws. Once the cover is removed, disconnect the wires one at a time, noting their positions.
Remove the old wall plate from the wall. You may need to unscrew it or use a different removal method depending on how it’s mounted. Ensure the wall surface is clean and smooth before installing the new Honeywell T6 Pro Z-Wave base plate.
Wiring the Honeywell T6 Pro Z-Wave
Carefully connect the labeled wires to the corresponding terminals on the Honeywell T6 Pro Z-Wave base plate. Refer to the wiring diagram included with your thermostat and the labels you created during old thermostat removal. Common terminals include R (power), C (common), W (heat), Y (cool), and G (fan).
Ensure each wire is securely inserted into the terminal and that no bare wire is exposed. A loose connection can cause malfunctions. If you have a C-wire, it’s crucial for reliable operation. If you don’t have a C-wire, consider using a C-wire adapter (sold separately).
Double-check all connections against the wiring diagram before proceeding. Incorrect wiring can damage the thermostat or your HVAC system.
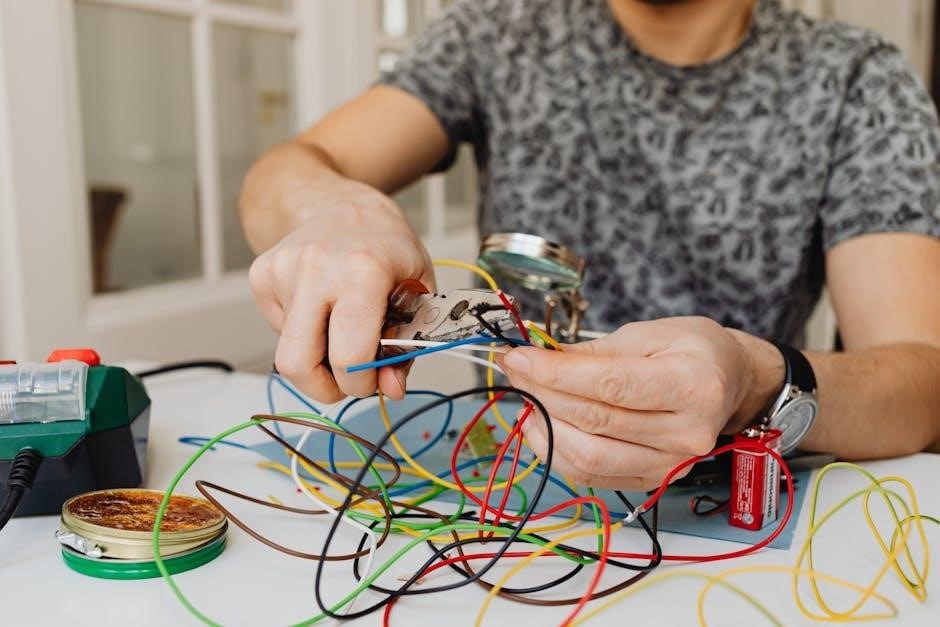
Identifying Thermostat Wires
Before disconnecting any wires from your old thermostat, meticulously label each wire with its corresponding terminal designation. Use the provided wire labels or create your own using tape and a pen. Common wire labels include R (power), C (common – often blue), W (heat), Y (cool), G (fan), and sometimes others like O/B (reversing valve).
Take a clear photograph of the existing wiring configuration as a backup reference. Note the wire colors associated with each terminal; however, always rely on the terminal labels, not the wire colors, as wiring colors can vary.
Carefully disconnect each wire, keeping the labels attached. This step is critical for a smooth and accurate installation of your Honeywell T6 Pro Z-Wave thermostat.
Connecting the Wires to the Base Plate
Using your labeled wires and the Honeywell T6 Pro Z-Wave base plate, carefully insert each wire into the corresponding terminal. Ensure the wires are fully inserted and securely fastened – a gentle tug will confirm a solid connection. Refer to the wiring diagram included with your thermostat and the photograph you took of your old thermostat’s wiring.
Double-check that each wire is connected to the correct terminal before proceeding. Incorrect wiring can damage your HVAC system. If you have a C-wire (common wire), it’s essential to connect it for reliable operation.
Once all wires are connected, gently arrange them within the base plate to avoid any strain or pinching.
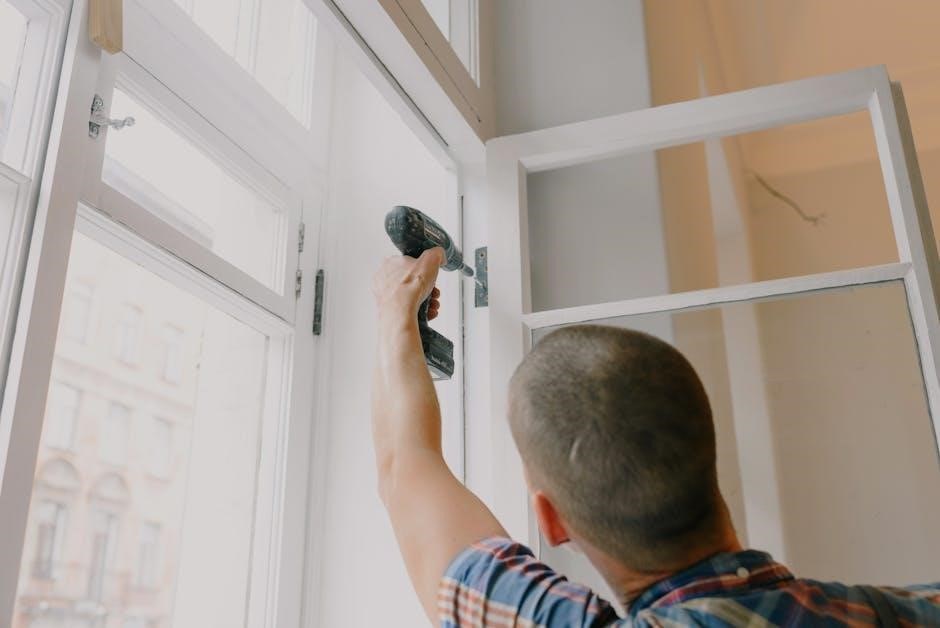
Mounting the Base Plate
With the wires securely connected, carefully position the Honeywell T6 Pro Z-Wave base plate onto the wall where your old thermostat was mounted. Use the provided screws and wall anchors (if necessary) to secure the base plate to the wall. Ensure the base plate is level for a clean and professional appearance.
Avoid overtightening the screws, as this could damage the base plate or the wall. Gently tighten them until the base plate is firmly in place. Verify that the wires are not pinched or strained during the mounting process.
Once the base plate is securely mounted, you are ready to attach the thermostat display unit.
Z-Wave Network Integration
This section details how to connect your Honeywell T6 Pro Z-Wave thermostat to your existing Z-Wave controller, enabling smart home automation and remote control.
Adding the Thermostat to Your Z-Wave Controller
To integrate your Honeywell T6 Pro Z-Wave thermostat into your Z-Wave network, you must first put your controller into inclusion mode. Refer to your controller’s manual for specific instructions, as the process varies between manufacturers like SmartThings or Hubitat.
Once the controller is ready, initiate inclusion mode on the thermostat itself. This typically involves navigating the thermostat’s menu – usually under ‘Install’ or ‘Network’ settings – and selecting ‘Add to Network’ or a similar option. The thermostat will then begin searching for a Z-Wave controller.
During this process, the thermostat may display a message indicating it’s searching. Ensure the thermostat is within a reasonable range of the controller (typically 30-100 feet) for a successful pairing. Successful inclusion is usually confirmed by a message on both the thermostat and the controller.
Z-Wave Inclusion Mode
Entering Z-Wave inclusion mode on the Honeywell T6 Pro prepares the thermostat to connect with your Z-Wave controller. Access the thermostat’s menu by pressing the ‘Menu’ button. Navigate using the up/down arrows to find the ‘Install’ or ‘Network’ section. Select ‘Z-Wave Inclusion’ or ‘Add to Network’ – the exact wording may vary.
Upon selection, the thermostat will initiate a search for a Z-Wave controller. The display will typically show a rotating icon or a message like “Searching…” or “Including…”. This process can take a few minutes. Ensure your controller is also in inclusion mode simultaneously.
Maintain a close proximity between the thermostat and the controller during inclusion. Avoid interference from other wireless devices. A successful inclusion will be indicated by a confirmation message on both devices, signifying a secure connection within your Z-Wave network.
Troubleshooting Z-Wave Pairing Issues
If the Honeywell T6 Pro Z-Wave fails to pair, first verify both the thermostat and your controller are in inclusion mode. Ensure they are within 10 feet of each other during the process, minimizing potential interference from other wireless devices. Try excluding the thermostat from the network first, then re-attempting inclusion.
Check your Z-Wave controller’s compatibility and ensure it supports the latest Z-Wave Plus standards. A weak signal strength can also cause pairing failures; consider a Z-Wave range extender if necessary. Confirm your controller isn’t at its device limit.
A reset of the thermostat may resolve stubborn pairing issues. Consult the manual for reset procedures. If problems persist, contact Honeywell support for further assistance, providing details about your controller and network setup.
Thermostat Configuration
After successful installation, configure your Honeywell T6 Pro Z-Wave by setting the system type, fan control, and preferred temperature units (°F or °C).
Setting the System Type (Heat, Cool, Heat/Cool)
Properly configuring the system type on your Honeywell T6 Pro Z-Wave thermostat is essential for correct operation. Access the thermostat’s settings menu, typically through the device interface or your Z-Wave controller’s app. You’ll find options to select between ‘Heat’, ‘Cool’, or ‘Heat/Cool’ modes.
Choose ‘Heat’ if your system only provides heating. Select ‘Cool’ if it only provides cooling. ‘Heat/Cool’ is appropriate for systems with both heating and cooling capabilities, allowing the thermostat to automatically switch between modes to maintain your desired temperature.
Incorrectly setting this parameter will prevent the thermostat from controlling your HVAC system effectively. Double-check your system’s configuration and select the corresponding option. Some systems may require additional configuration within the thermostat’s advanced settings to ensure compatibility. Refer to the full manual for detailed instructions specific to your HVAC setup.
Configuring Fan Control
The Honeywell T6 Pro Z-Wave thermostat offers flexible fan control options to enhance your comfort. Within the settings menu, locate the ‘Fan’ configuration section. You’ll typically find options like ‘Auto’, ‘On’, and potentially ‘Circulate’.
‘Auto’ mode runs the fan only during heating or cooling cycles. ‘On’ keeps the fan running continuously, providing constant air circulation. ‘Circulate’ periodically runs the fan, even when heating or cooling isn’t active, to maintain consistent temperature distribution.
Selecting the appropriate fan mode depends on your preferences and home’s needs. Continuous fan operation can improve air quality but may increase energy consumption. Experiment with different settings to find the optimal balance between comfort and efficiency. Remember to save your changes after configuring the fan control settings.
Setting Temperature Units (°F or °C)
The Honeywell T6 Pro Z-Wave thermostat allows you to display temperatures in either Fahrenheit (°F) or Celsius (°C) to suit your preference. Access the thermostat’s settings menu, usually through the touchscreen interface or the associated mobile app.
Navigate to the ‘Display’ or ‘Units’ section. Here, you’ll find an option to select your desired temperature unit. Simply choose between °F and °C. The thermostat will immediately update all temperature readings to reflect your selection.
This setting doesn’t affect the thermostat’s operation; it only changes how temperatures are displayed. Ensure consistency with other temperature-measuring devices in your home for easy comparison. Save the changes to confirm your preferred temperature unit.
Advanced Settings & Features
Explore enhanced capabilities like geofencing, smart home integrations (SmartThings, Hubitat), and customizable schedules for optimal comfort and energy efficiency with your T6 Pro.
Geofencing Setup with Z-Wave
Geofencing utilizes your smartphone’s location to automatically adjust the thermostat settings, maximizing comfort and energy savings. When your phone leaves a predefined geographical area (your “fence”), the thermostat can switch to an away mode, lowering heating or raising cooling temperatures. Upon returning home, the thermostat reverts to your preferred comfort settings.
To configure geofencing, you’ll need a Z-Wave compatible hub that supports geofencing functionality. Within your hub’s app, you’ll define the geofence radius around your home. You’ll also need to link your smartphone to the hub and grant location permissions. The Honeywell T6 Pro Z-Wave communicates with the hub, receiving location updates and adjusting accordingly.
Ensure accurate location services are enabled on your phone for reliable geofencing performance. Consider setting a buffer zone to prevent false triggers. Geofencing offers a convenient, hands-free way to manage your home’s temperature and reduce energy consumption, enhancing the smart capabilities of your T6 Pro thermostat.
Smart Home Integration (e.g., SmartThings, Hubitat)
The Honeywell T6 Pro Z-Wave seamlessly integrates with popular smart home platforms like SmartThings and Hubitat, expanding your home automation possibilities. This integration allows you to control your thermostat through the platform’s app, create custom routines, and combine it with other smart devices.
To connect, first ensure your Z-Wave controller is compatible and properly set up. Initiate the inclusion process within your smart home platform’s app, putting the thermostat into pairing mode. Once paired, you can access thermostat controls, set schedules, and create automations.
For example, you could create a routine that automatically adjusts the temperature when your smart lights turn on or off. Leveraging these integrations unlocks advanced features and provides a unified control experience for your entire smart home ecosystem, maximizing convenience and energy efficiency.
Utilizing Schedules and Programs
The Honeywell T6 Pro Z-Wave thermostat excels in energy management through its robust scheduling capabilities. You can program different temperature setpoints for various times of the day and days of the week, optimizing comfort and reducing energy consumption. This allows for customized heating and cooling based on your lifestyle and occupancy patterns.
Creating Custom Schedules is straightforward via the thermostat interface or your Z-Wave controller’s app. Define specific time periods (e.g;, Wake, Leave, Return, Sleep) and assign desired temperatures to each. Adjusting Temperature Setpoints within these schedules is simple, ensuring optimal comfort levels.
Utilize pre-programmed schedules or create entirely new ones tailored to your needs. Regularly reviewing and adjusting schedules based on seasonal changes or lifestyle shifts will maximize energy savings and maintain a comfortable home environment.
Creating Custom Schedules
To establish personalized comfort and energy savings, the Honeywell T6 Pro Z-Wave allows for the creation of custom schedules. Access the scheduling menu through the thermostat’s display or your connected Z-Wave hub’s interface. Begin by defining distinct periods – typically Wake, Leave, Return, and Sleep – but you can add or modify these to suit your daily routine;
For each period, assign a start time and a corresponding temperature setpoint. Consider your occupancy patterns; lower temperatures while away and increase them before your return. The system supports different schedules for weekdays and weekends, offering maximum flexibility.
Save your schedule and monitor its performance, making adjustments as needed to optimize comfort and efficiency. Regularly reviewing and refining your custom schedules ensures continued energy savings.
Adjusting Temperature Setpoints
The Honeywell T6 Pro Z-Wave offers multiple ways to adjust temperature setpoints, ensuring personalized comfort. Directly modify the temperature using the up and down arrows on the thermostat’s display. Alternatively, control settings remotely via your Z-Wave controller or associated mobile app. When adjusting, consider the system type – Heat, Cool, or Heat/Cool – as this dictates how the thermostat responds.
For precise control, utilize the scheduling feature to pre-define setpoints for different times of day. Experiment with small adjustments to find the optimal balance between comfort and energy efficiency. Remember that even a few degrees can significantly impact your energy bill.
Monitor the actual room temperature and adjust setpoints accordingly to maintain your desired climate.
Network and Port Configuration
Proper network setup, including understanding ports 80, 8080, and 3128, is vital for reliable Z-Wave communication and optimal Honeywell T6 Pro functionality.
Understanding Proxy Server Ports (80, 8080, 3128)
The Honeywell T6 Pro Z-Wave thermostat, when integrated into a network utilizing a proxy server, relies on specific port configurations for seamless communication. While the standard HTTP port is 80, proxy servers often employ alternative ports like 8080 or 3128 for various functions. Understanding these ports is crucial for troubleshooting connectivity issues.
Connections between your thermostat and the proxy server may utilize TCP ports beyond the standard 80. Commonly, ports 3128 or 8080 are used. Web authentication, by default, often listens on port 80, so HTTP GET requests might be dropped if directed to a different proxy port. The default values frequently include 8080 or 80 for HTTP, 3128 for Squid HTTP proxy, and 1080 for SOCKS protocols.
The string “:8080 :3128 :3128 :80” often represents a search query for proxy servers, highlighting the prevalence of these ports. Correctly configuring these ports ensures the thermostat can effectively communicate with the Z-Wave network and respond to commands.
Configuring Proxy Authentication
If your HTTP or SOCKS 5 proxy server requires authentication for connecting components, enabling proxy authentication within the Honeywell T6 Pro Z-Wave thermostat’s network settings is essential. This ensures secure communication and prevents unauthorized access to your smart home network.
To configure authentication, navigate to the network settings within the thermostat’s interface and locate the proxy configuration section. You will be prompted to enter the required credentials – a User Name and Password – previously established for your proxy server.
Accurate entry of these credentials is vital; incorrect information will result in failed connections and prevent the thermostat from communicating with the Z-Wave controller. Verify the credentials carefully before saving the settings. Successful authentication allows the thermostat to securely access the internet through the proxy server.
Z-Wave Network Security Considerations
Securing your Z-Wave network is paramount when integrating the Honeywell T6 Pro Z-Wave thermostat into your smart home ecosystem. Z-Wave utilizes encryption to protect data transmitted between devices, but maintaining a secure network requires proactive measures.
Ensure your Z-Wave controller utilizes the latest security protocols (S2 security is recommended) and regularly update its firmware. Limit network access to trusted devices only, and periodically review the device list for any unauthorized entries.
Strong passwords for your Z-Wave controller and any associated accounts are crucial. Be mindful of potential vulnerabilities introduced by other connected devices. Regularly check for firmware updates for the thermostat itself to patch any security flaws. A secure Z-Wave network protects your privacy and ensures reliable operation.

Troubleshooting & Support
This section offers solutions for common installation problems, guides you through resetting the Honeywell T6 Pro Z-Wave, and provides contact information for Honeywell support.
Common Installation Problems
Wiring Issues: Incorrect wiring is a frequent problem. Double-check all wire connections against the wiring diagram, ensuring each wire is securely fastened to the correct terminal on the base plate. A loose connection can cause intermittent operation or complete failure.
Z-Wave Pairing Failures: Difficulty adding the thermostat to your Z-Wave controller often stems from distance or interference. Ensure the thermostat is within the controller’s range and minimize obstructions. Try performing the inclusion process closer to the controller.
Power Supply Problems: If the thermostat doesn’t power on, verify the C-wire (common wire) is connected correctly. Some systems require a C-wire for consistent power. If a C-wire isn’t available, a C-wire adapter may be necessary.
Display Issues: A blank or flickering display can indicate a power problem or a faulty thermostat. Check the power supply and wiring again. If the issue persists, contact Honeywell support.
Incorrect System Type: Setting the wrong system type (heat, cool, or heat/cool) will lead to improper operation; Verify the correct system type in the thermostat’s settings.
Resetting the Honeywell T6 Pro Z-Wave
Factory Reset: To restore the Honeywell T6 Pro Z-Wave to its original factory settings, press and hold the ‘Menu’ and ‘Down’ buttons simultaneously for approximately five seconds. The thermostat will restart and revert to the initial setup screen.
Z-Wave Network Reset: If you’re experiencing Z-Wave connectivity issues, you may need to exclude the thermostat from your current network before re-including it. Use your Z-Wave controller’s exclusion process.
Soft Reset: A soft reset can resolve minor glitches. Simply power cycle the thermostat by removing it from the base plate for 30 seconds, then reattaching it. This doesn’t erase settings.
Important Note: Performing a factory reset will erase all custom settings, schedules, and network configurations. Ensure you have a record of your desired settings before proceeding.

Caution: Resetting the thermostat may disrupt your smart home automation routines. Reconfigure any associated rules or scenes after the reset.
Contacting Honeywell Support
For dedicated assistance with your Honeywell T6 Pro Z-Wave thermostat, Honeywell offers multiple support channels. Visit the official Honeywell Home website at honeywellhome.com for a comprehensive FAQ section, troubleshooting guides, and downloadable resources.
You can also reach Honeywell Support directly via phone. The customer support number is readily available on their website, typically categorized by product type. Expect potential wait times during peak hours;
Online chat support is often available, providing a convenient way to connect with a representative in real-time. Check the Honeywell Home website for chat availability.
When contacting support, have your thermostat’s model number and date of purchase readily available. Clearly describe the issue you’re experiencing and any troubleshooting steps you’ve already taken.
Leave a Reply
You must be logged in to post a comment.